This guide covers the essential features of your Maslow 4 CNC machine’s web interface, including connecting to WiFi, uploading files, and running your first cuts.
Connecting to Your Maslow
Step 1: Power On
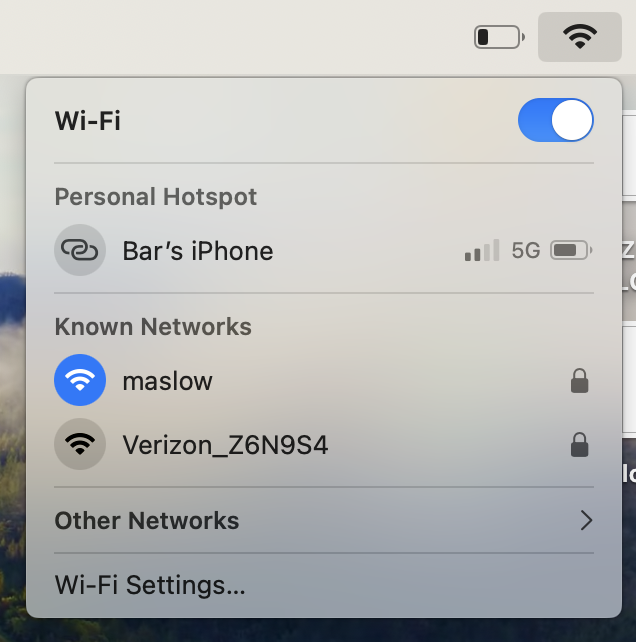
When powered on, your Maslow 4 creates a WiFi network named maslow. The default password is 12345678.
Step 2: Connect to WiFi
Connect your computer, smartphone, or tablet to the maslow WiFi network.
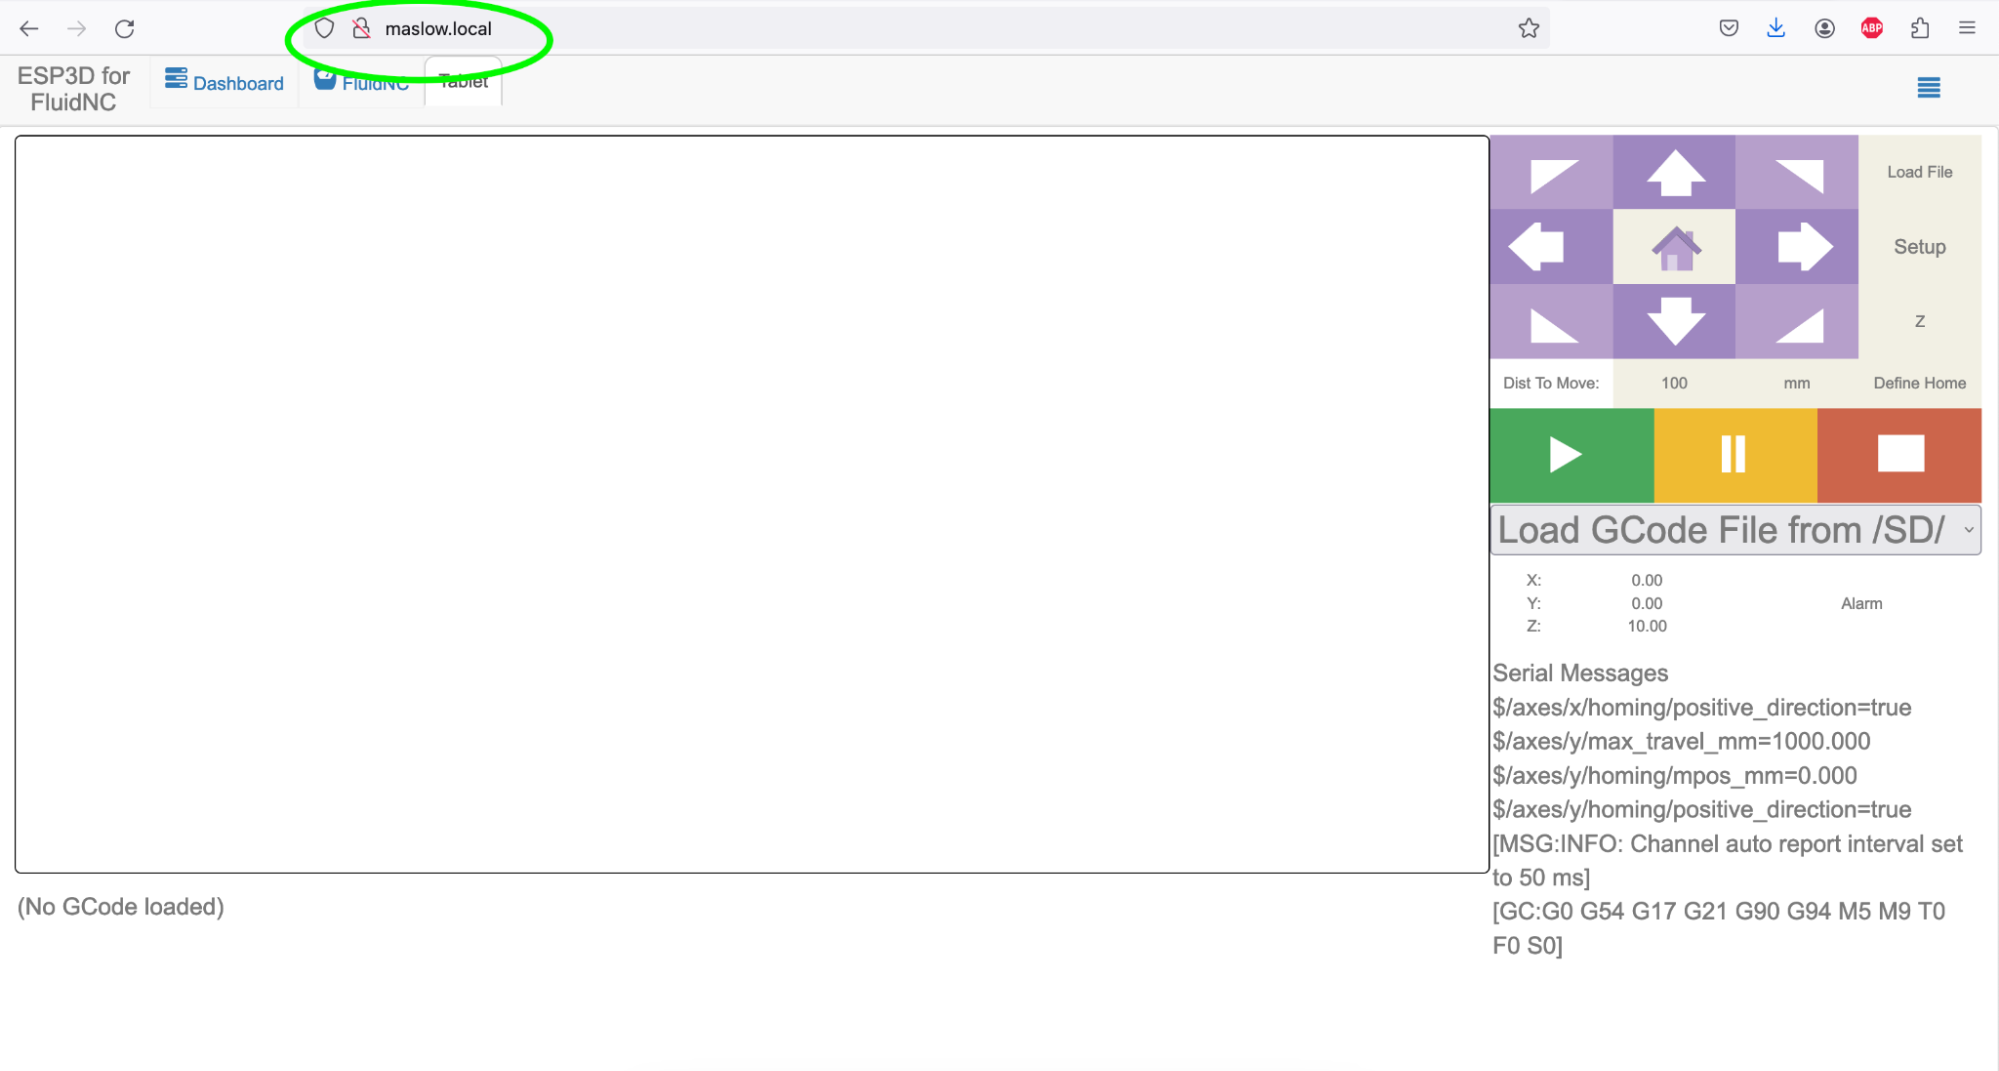
Step 3: Access the Web Interface
The interface may auto-open when you connect. If not, enter 192.168.0.1 in your browser’s address bar.
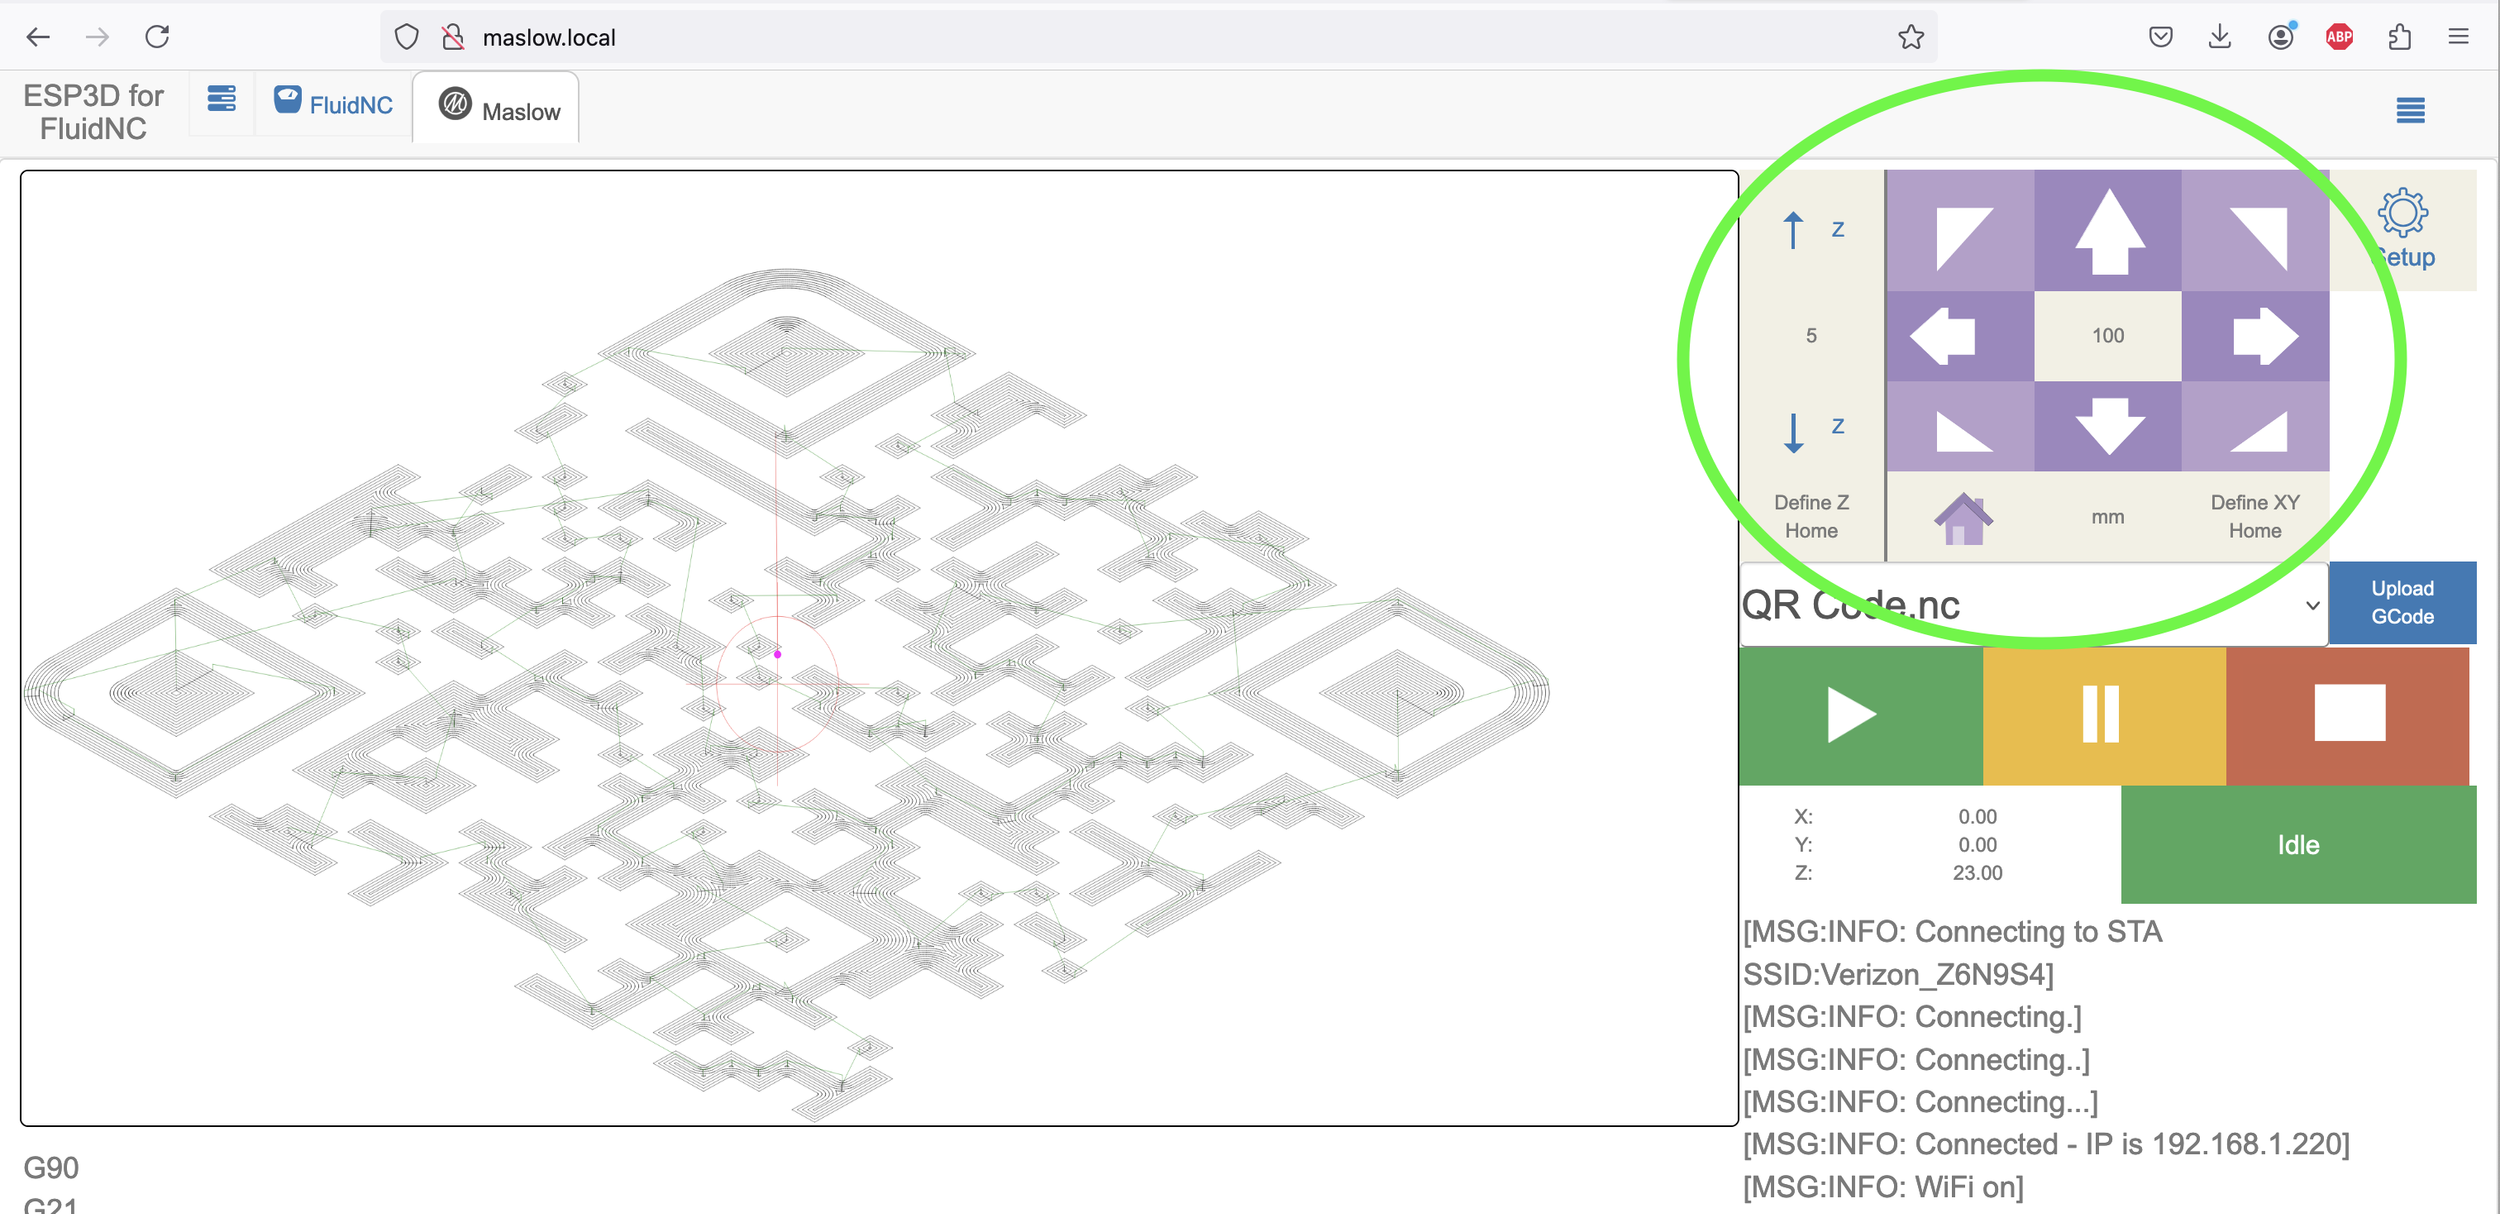
Web Interface Overview
The Maslow 4 web interface provides all the controls you need to operate your CNC machine without installing any additional software.
Main Dashboard
The main dashboard displays:
- Machine status
- Current position (X, Y, Z coordinates)
- Connection status
- Quick access to common actions

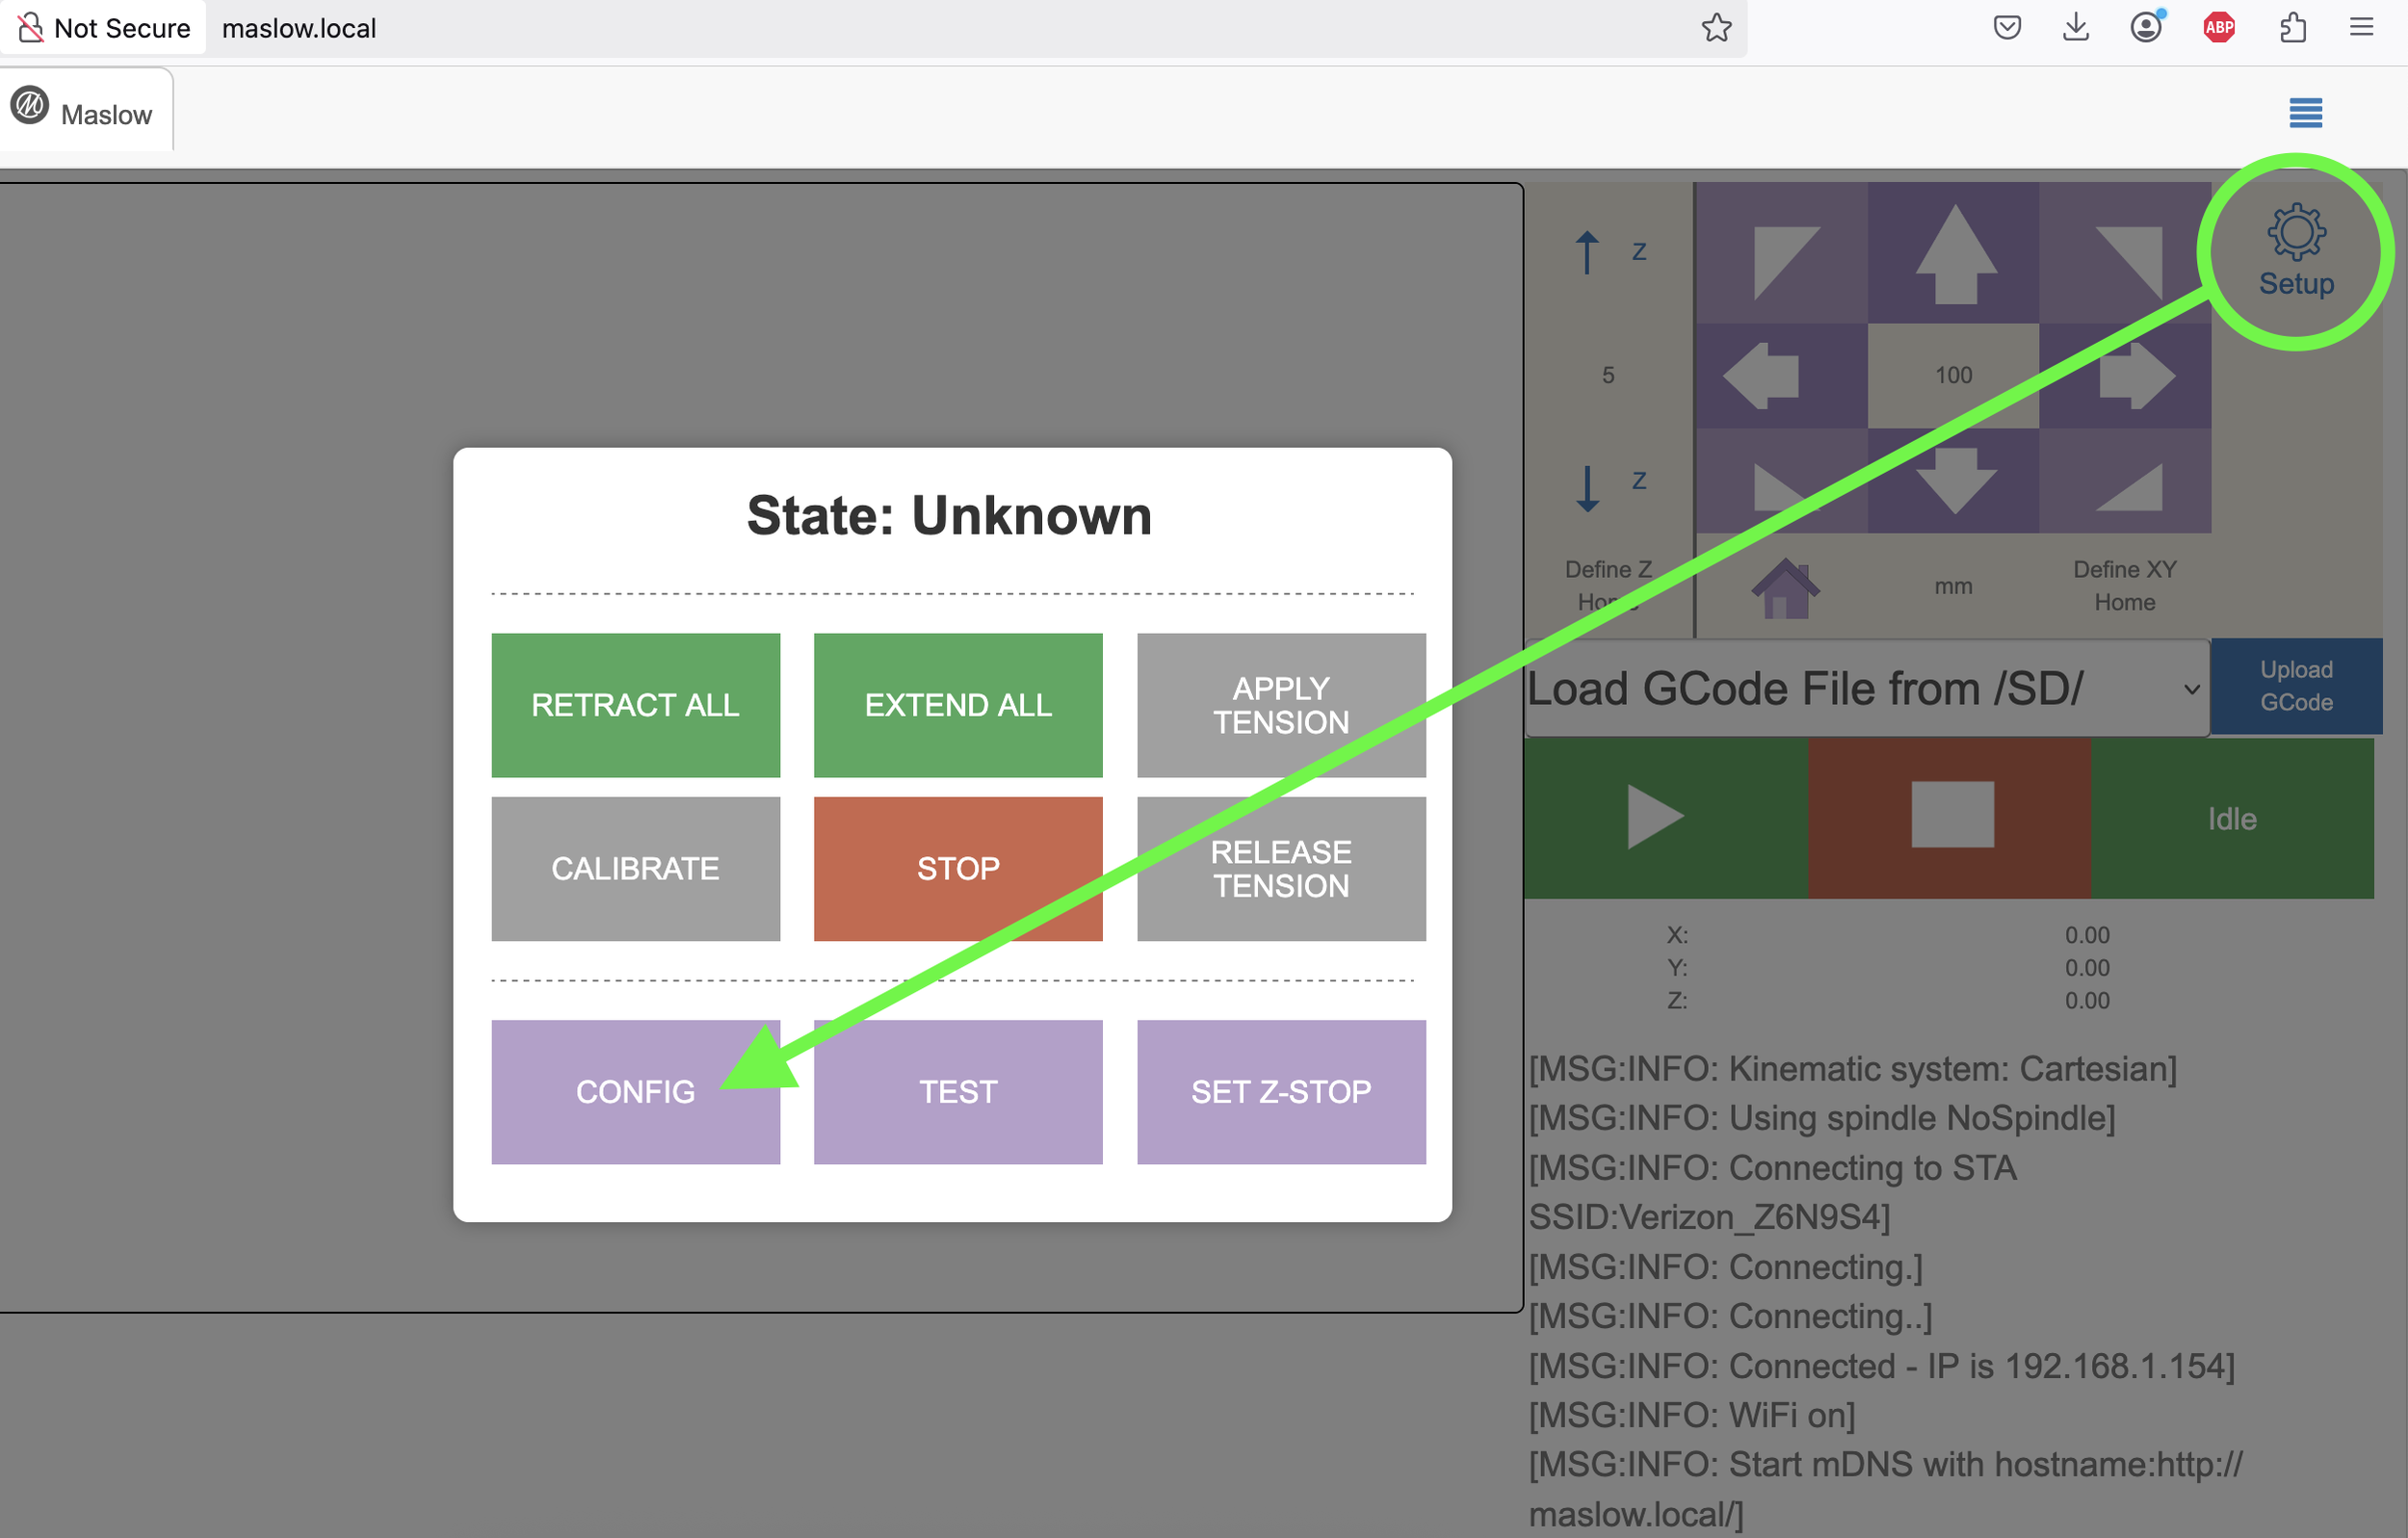
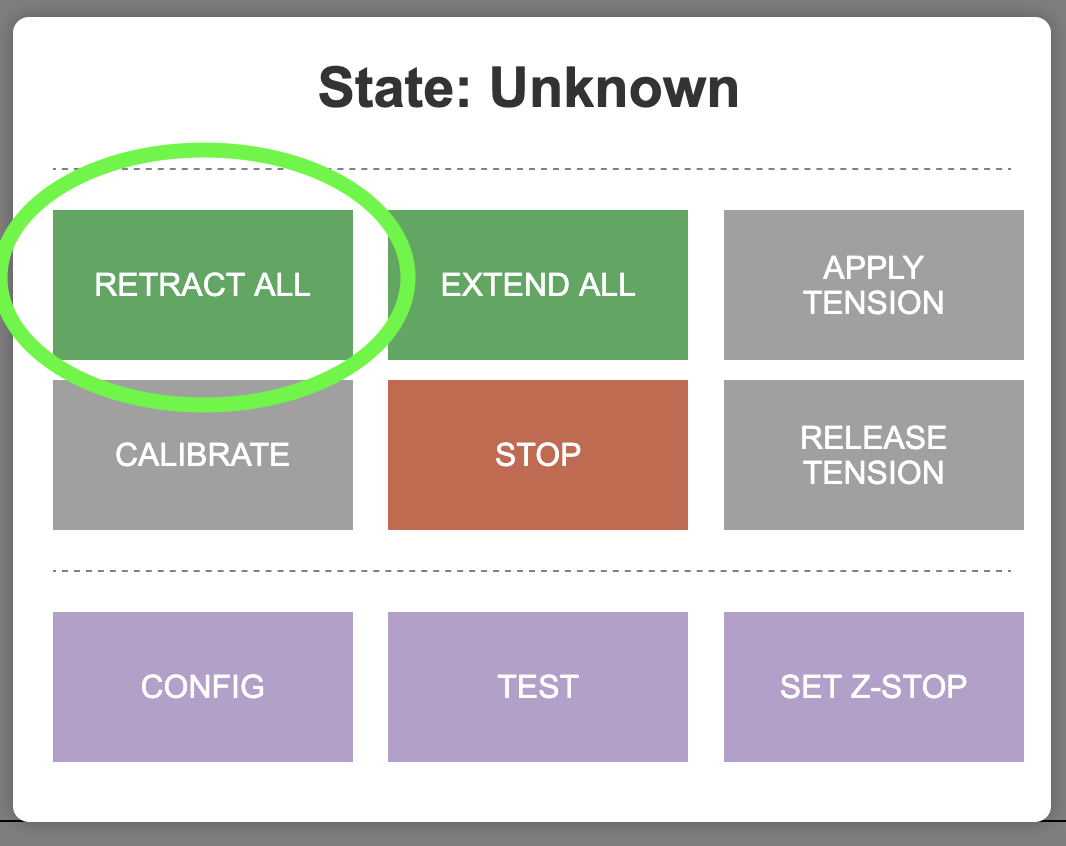
Actions Menu
The Actions menu provides access to:
- Home Position: Define and return to the home position
- Move Machine: Manual jog controls for X, Y, and Z axes
- Calibration: Run the calibration wizard
- Run G-code: Execute uploaded G-code files

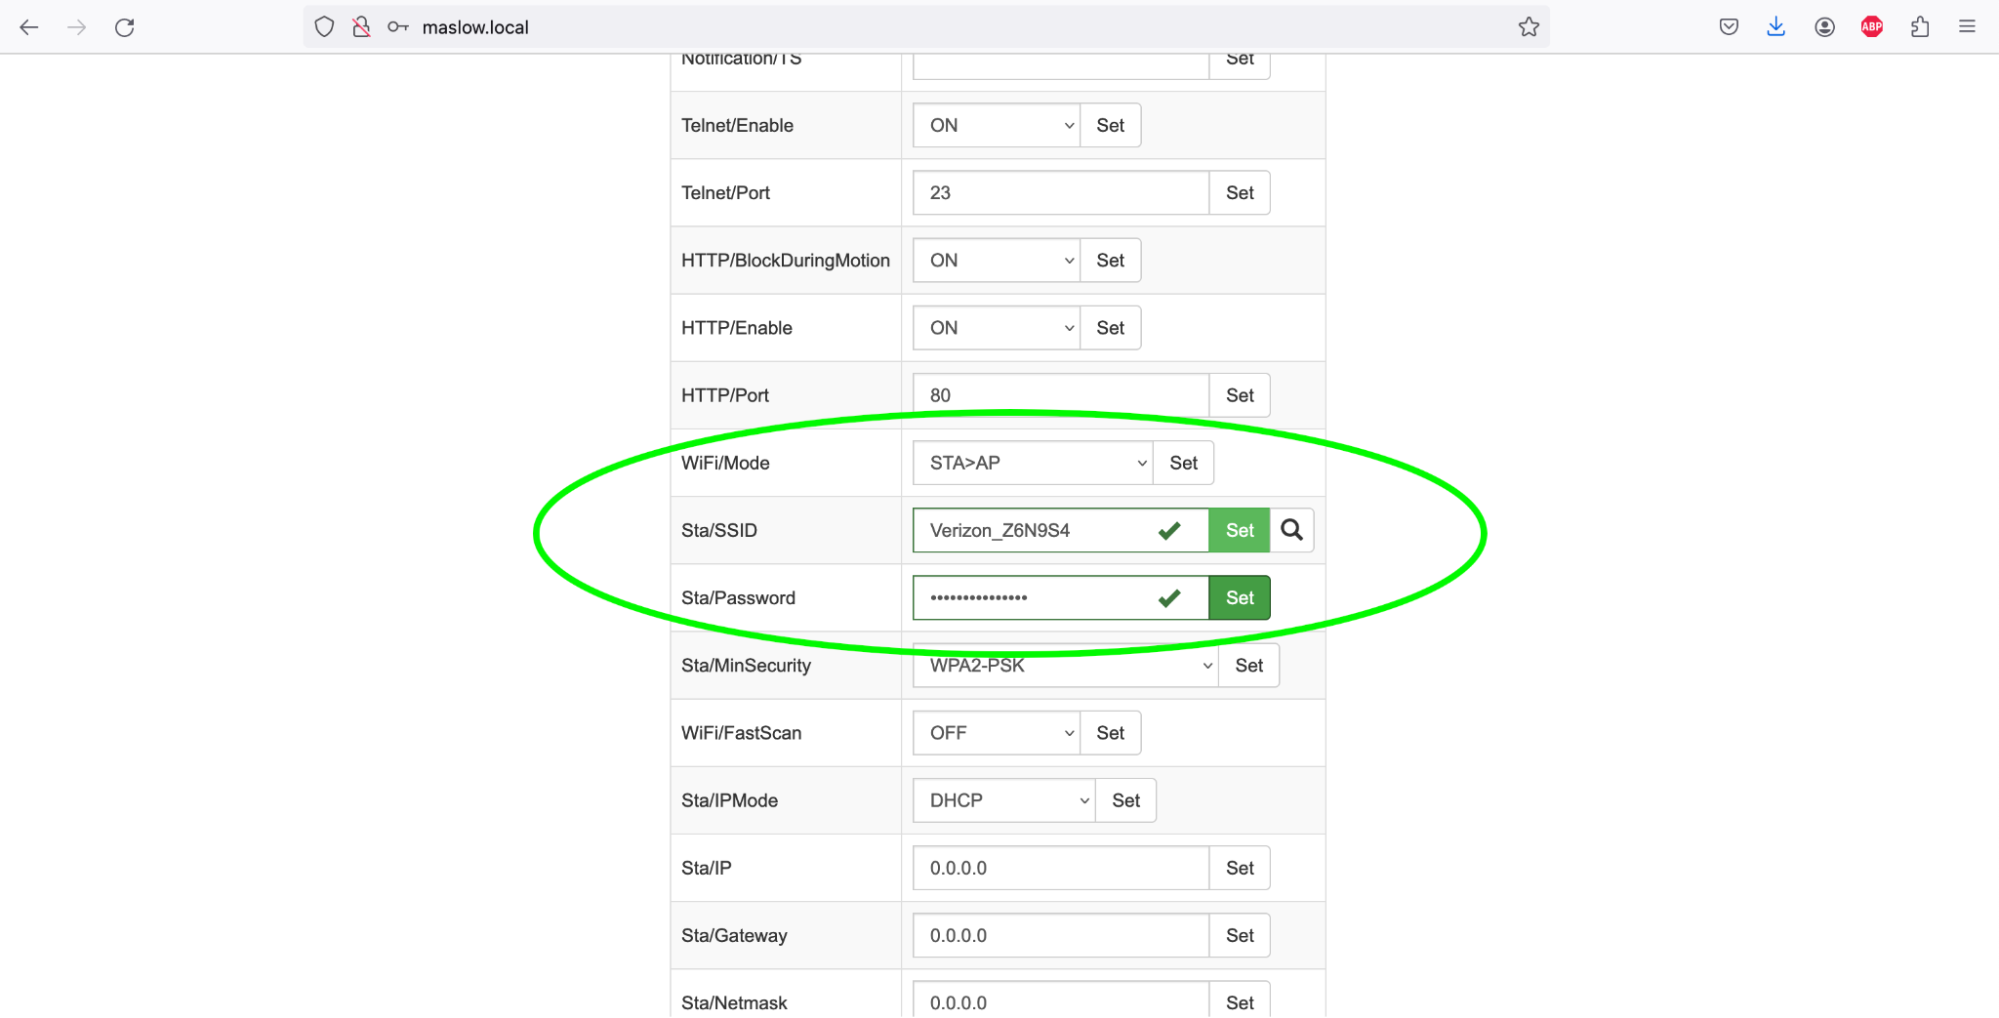
Configuring WiFi (Optional)
You can configure Maslow to join your home WiFi for networked access from any device on your network.
Steps to Connect to Home WiFi
- Access the web interface via the default
maslownetwork - Navigate to the “FluidNC” tab or “Network” settings
- Enter your home WiFi credentials
- Save and restart the machine

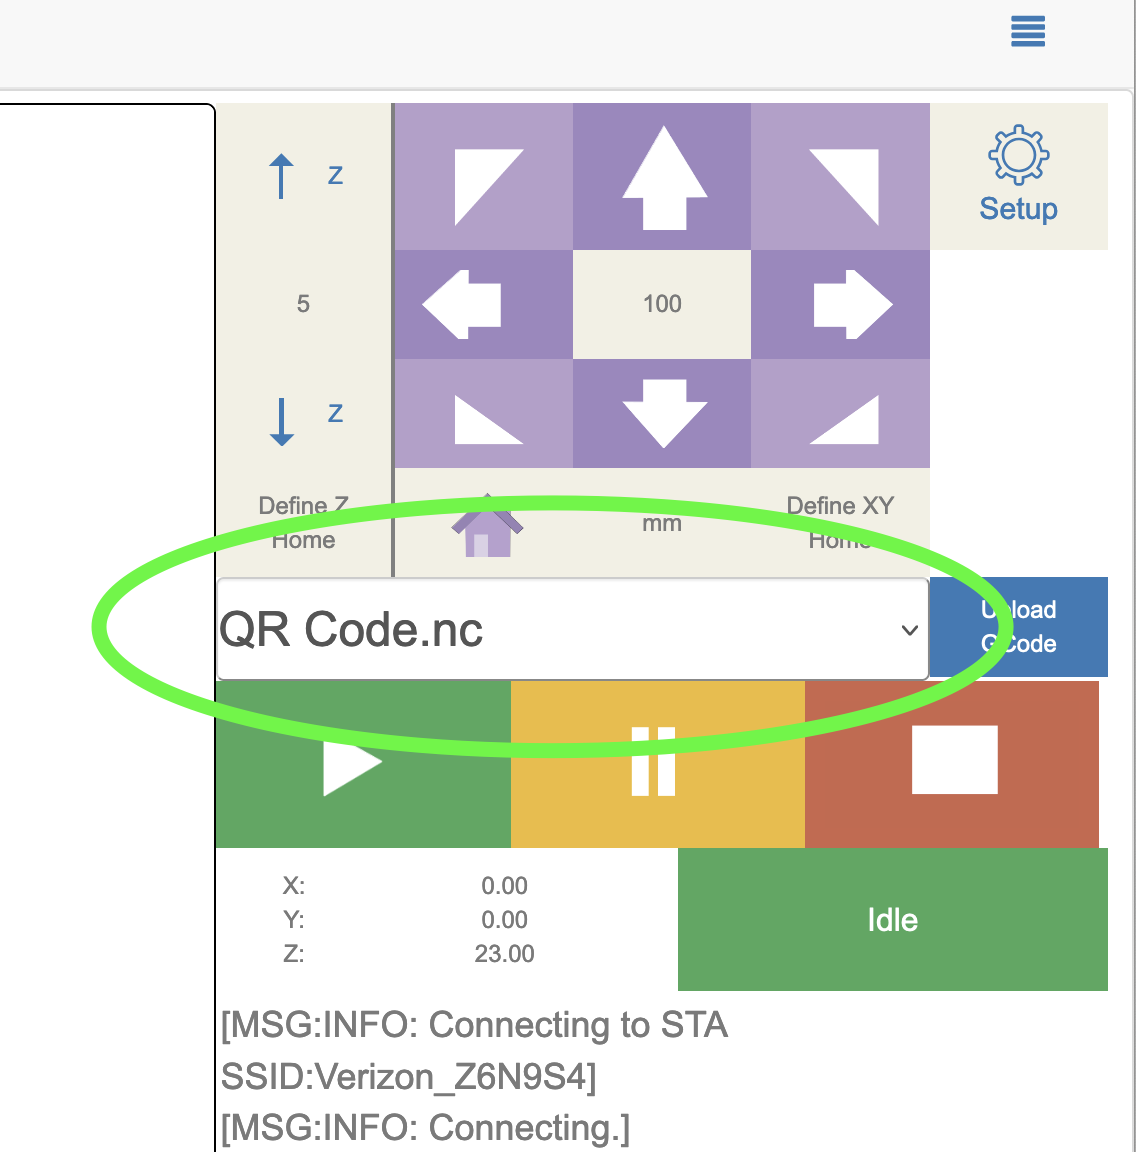
Uploading and Running G-code Files
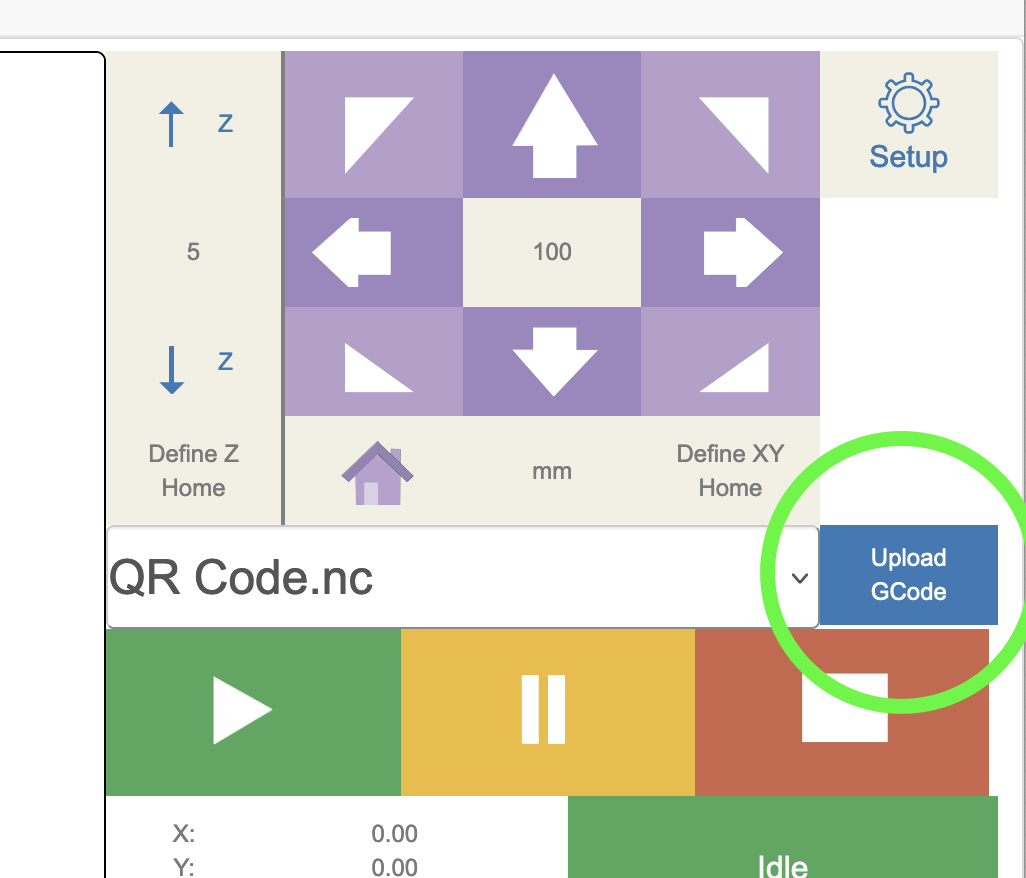
Uploading Files
- Navigate to the “Files” or “Actions” menu
- Click “Upload files”
- Select your
.ncG-code file - Wait for the upload to complete
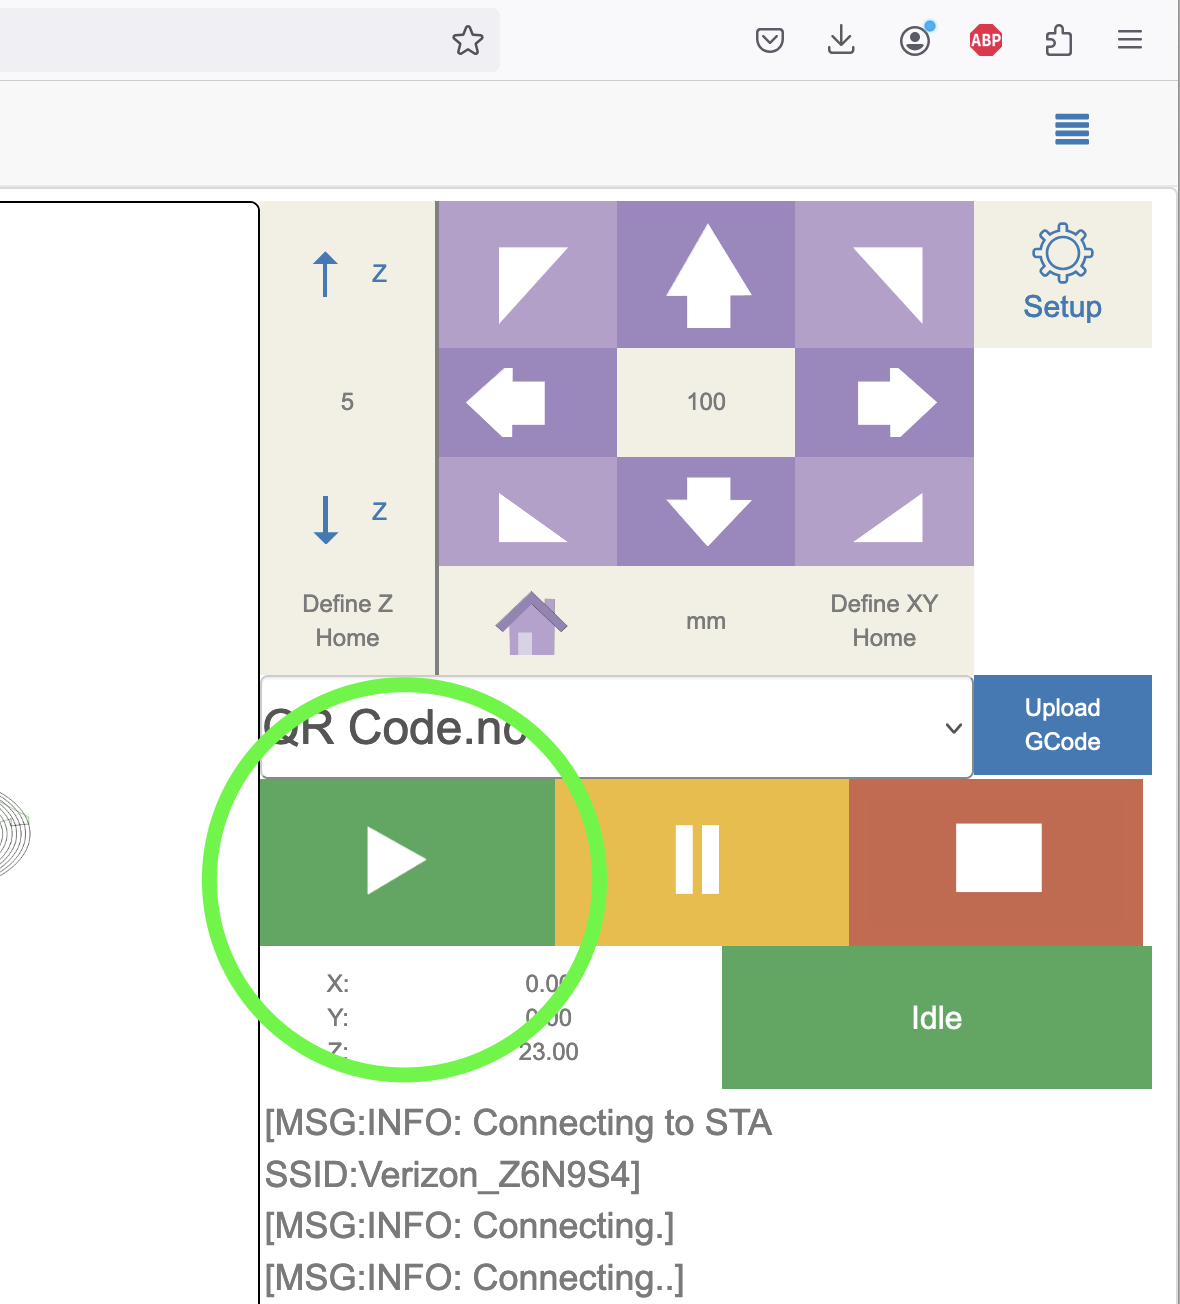
Running a G-code File
- Select the uploaded file from the list
- Set the start position (or pick a specific line if resuming)
- Click “Run” to start the job
- Monitor progress from the dashboard
Visualizing Tool Paths
The web interface can display a visual preview of the tool path, helping you verify the job before running.
Manual Machine Controls
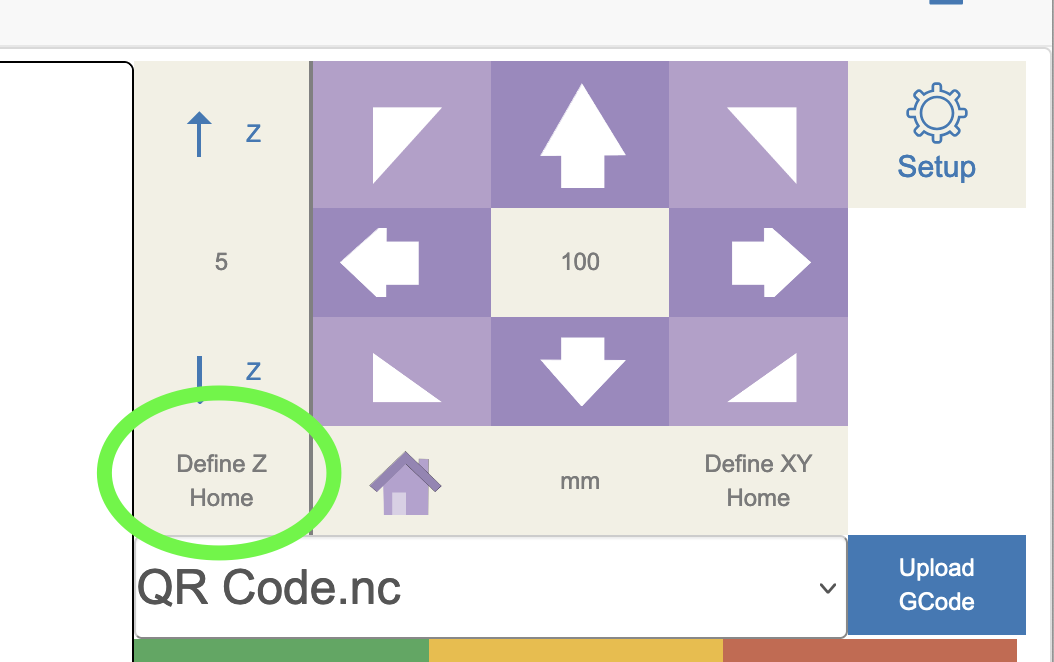
Jog Controls
Use the arrow buttons to manually move the machine:
- X-axis: Left and right movement
- Y-axis: Up and down movement (on vertical setup)
- Z-axis: Router depth control
Zeroing Position
Set the current position as zero for any axis:
- Move the machine to your desired zero point
- Click the “Zero” button for the appropriate axis
- Confirm the new zero position
Spindle Control
Control the router/spindle using built-in macros:
- M3: Spindle ON
- M5: Spindle OFF
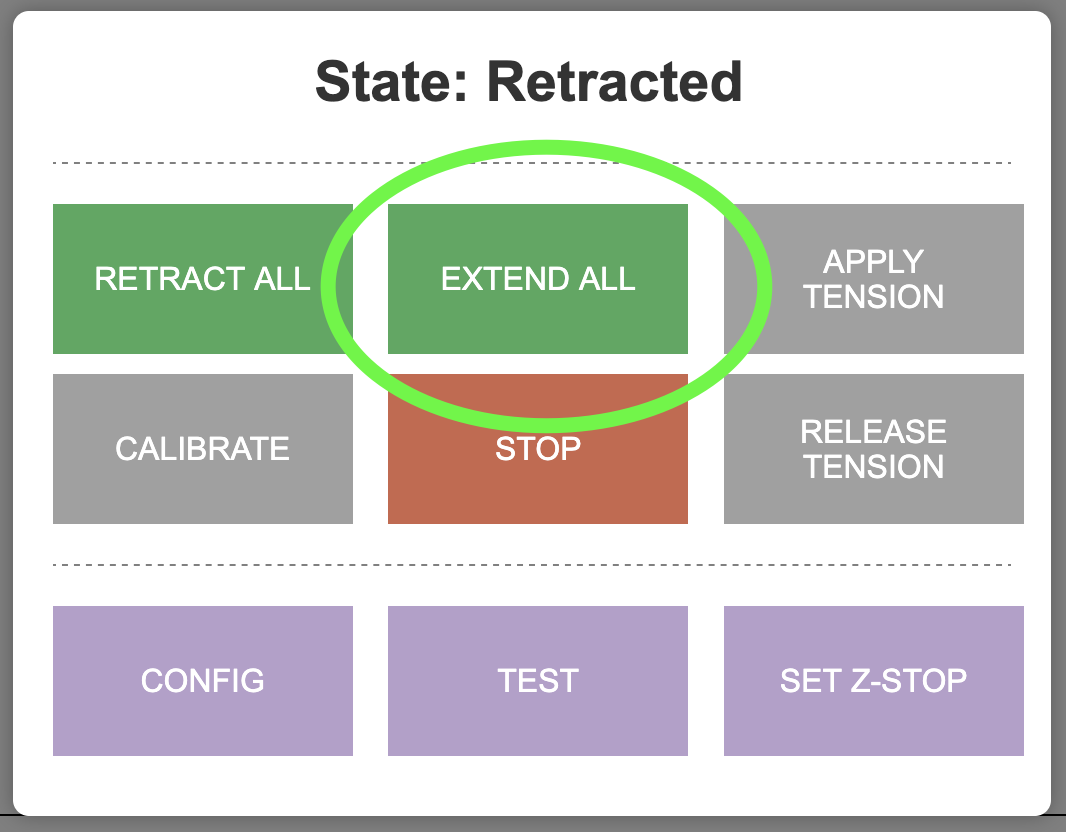
Extending and Retracting Belts
The belts can be extended or retracted using the controls in the interface.


Updating Firmware
Keeping your firmware up to date ensures you have the latest features and bug fixes.
Firmware Update Process
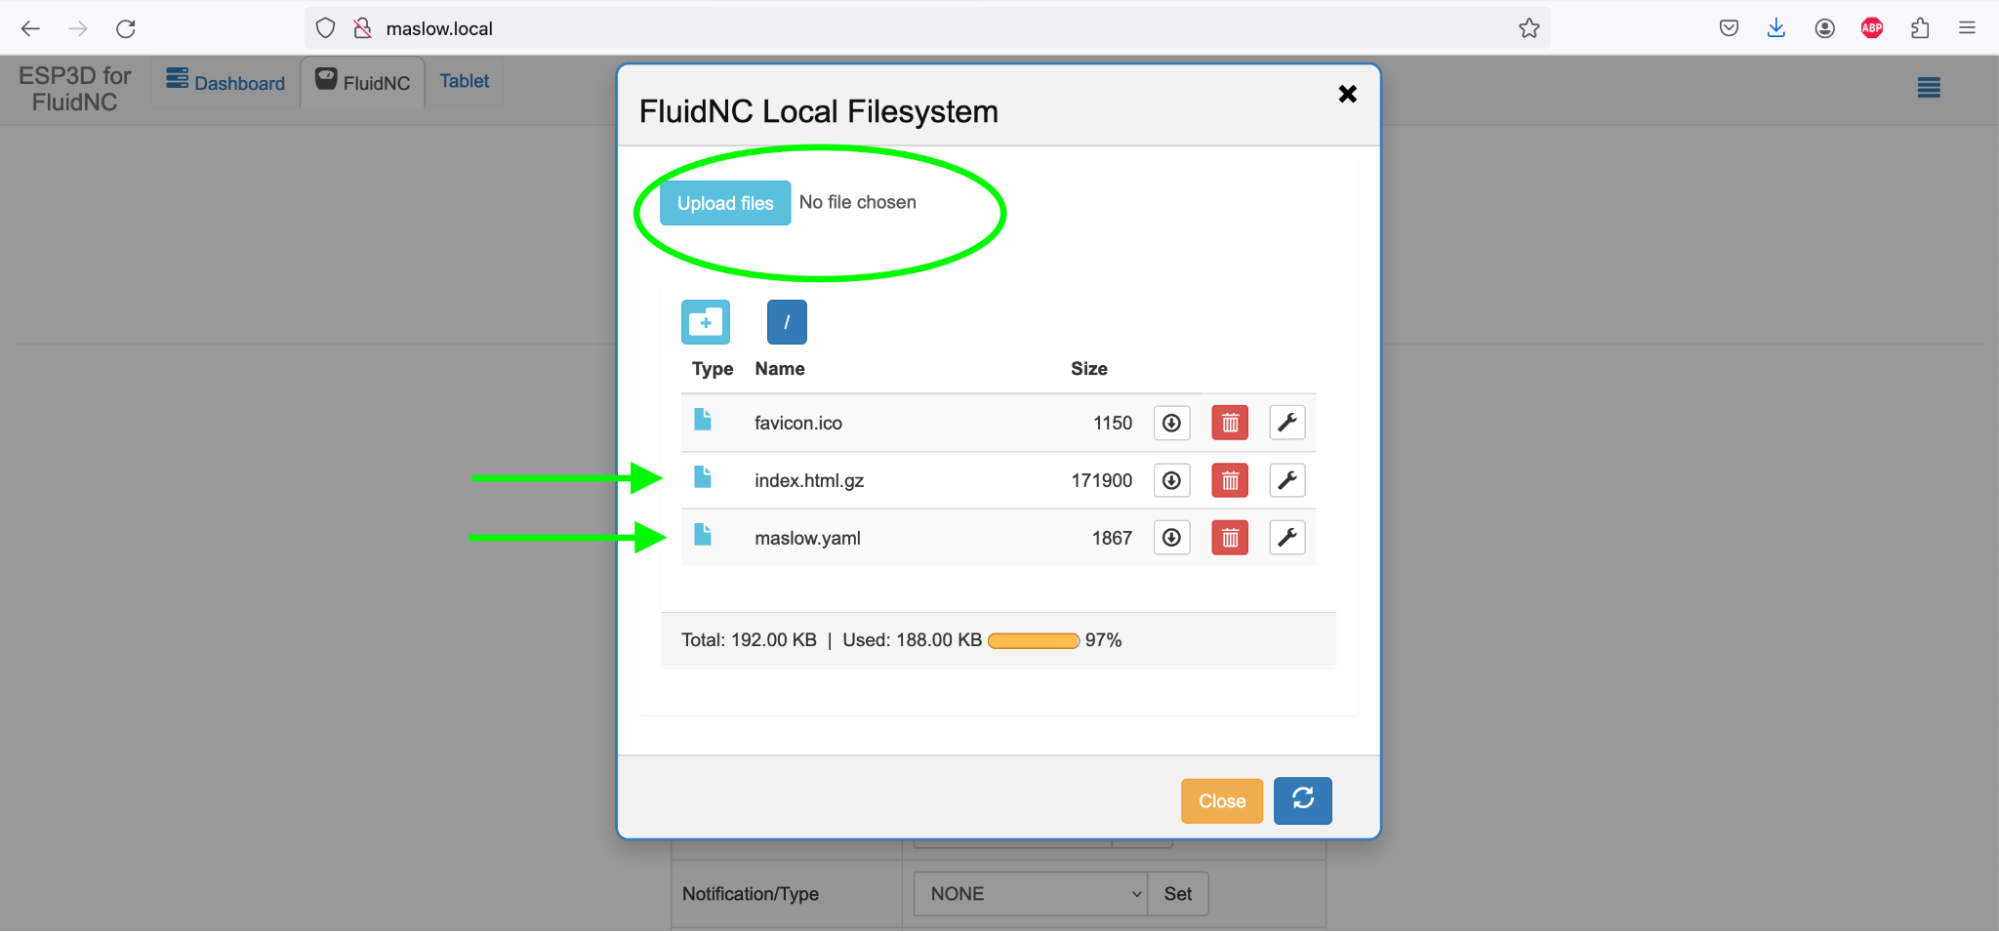
- Download the latest firmware from GitHub Releases:
firmware.binindex.html.gzmaslow.yaml
-
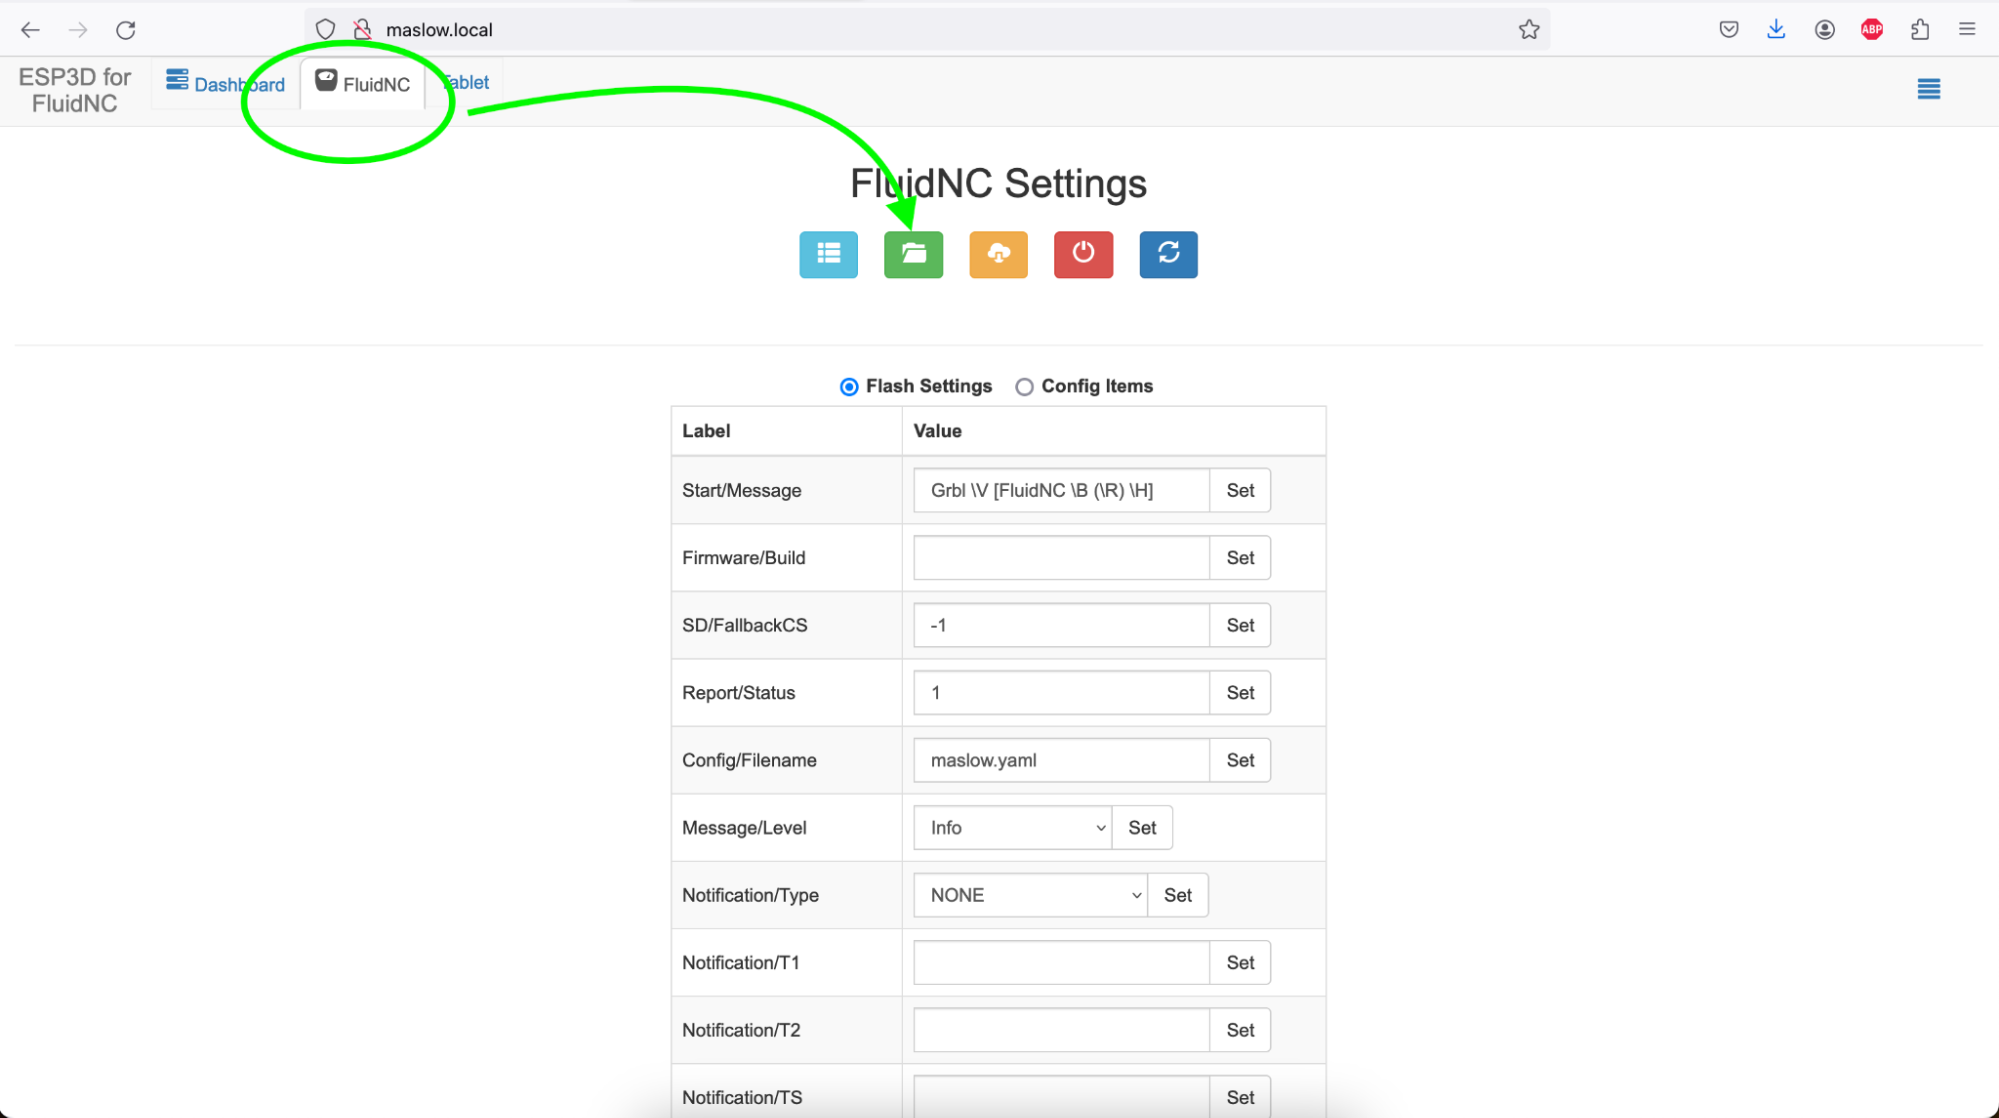
Access the web interface and go to the “FluidNC” tab
-
Click “Update the Firmware” and select
firmware.bin -
Upload the other files using the file upload function
- Restart the machine

Note: If updating from a version before 1.0 to after 1.0, a USB cable is required. See the official documentation for USB update instructions.
Calibration
Access the calibration wizard from the Actions menu. The wizard will guide you through:
- Belt extension and retraction
- Home position definition
- Anchor point measurement
- Calibration grid setup
- Automated calibration process

For detailed calibration instructions, see Putting It All Together.
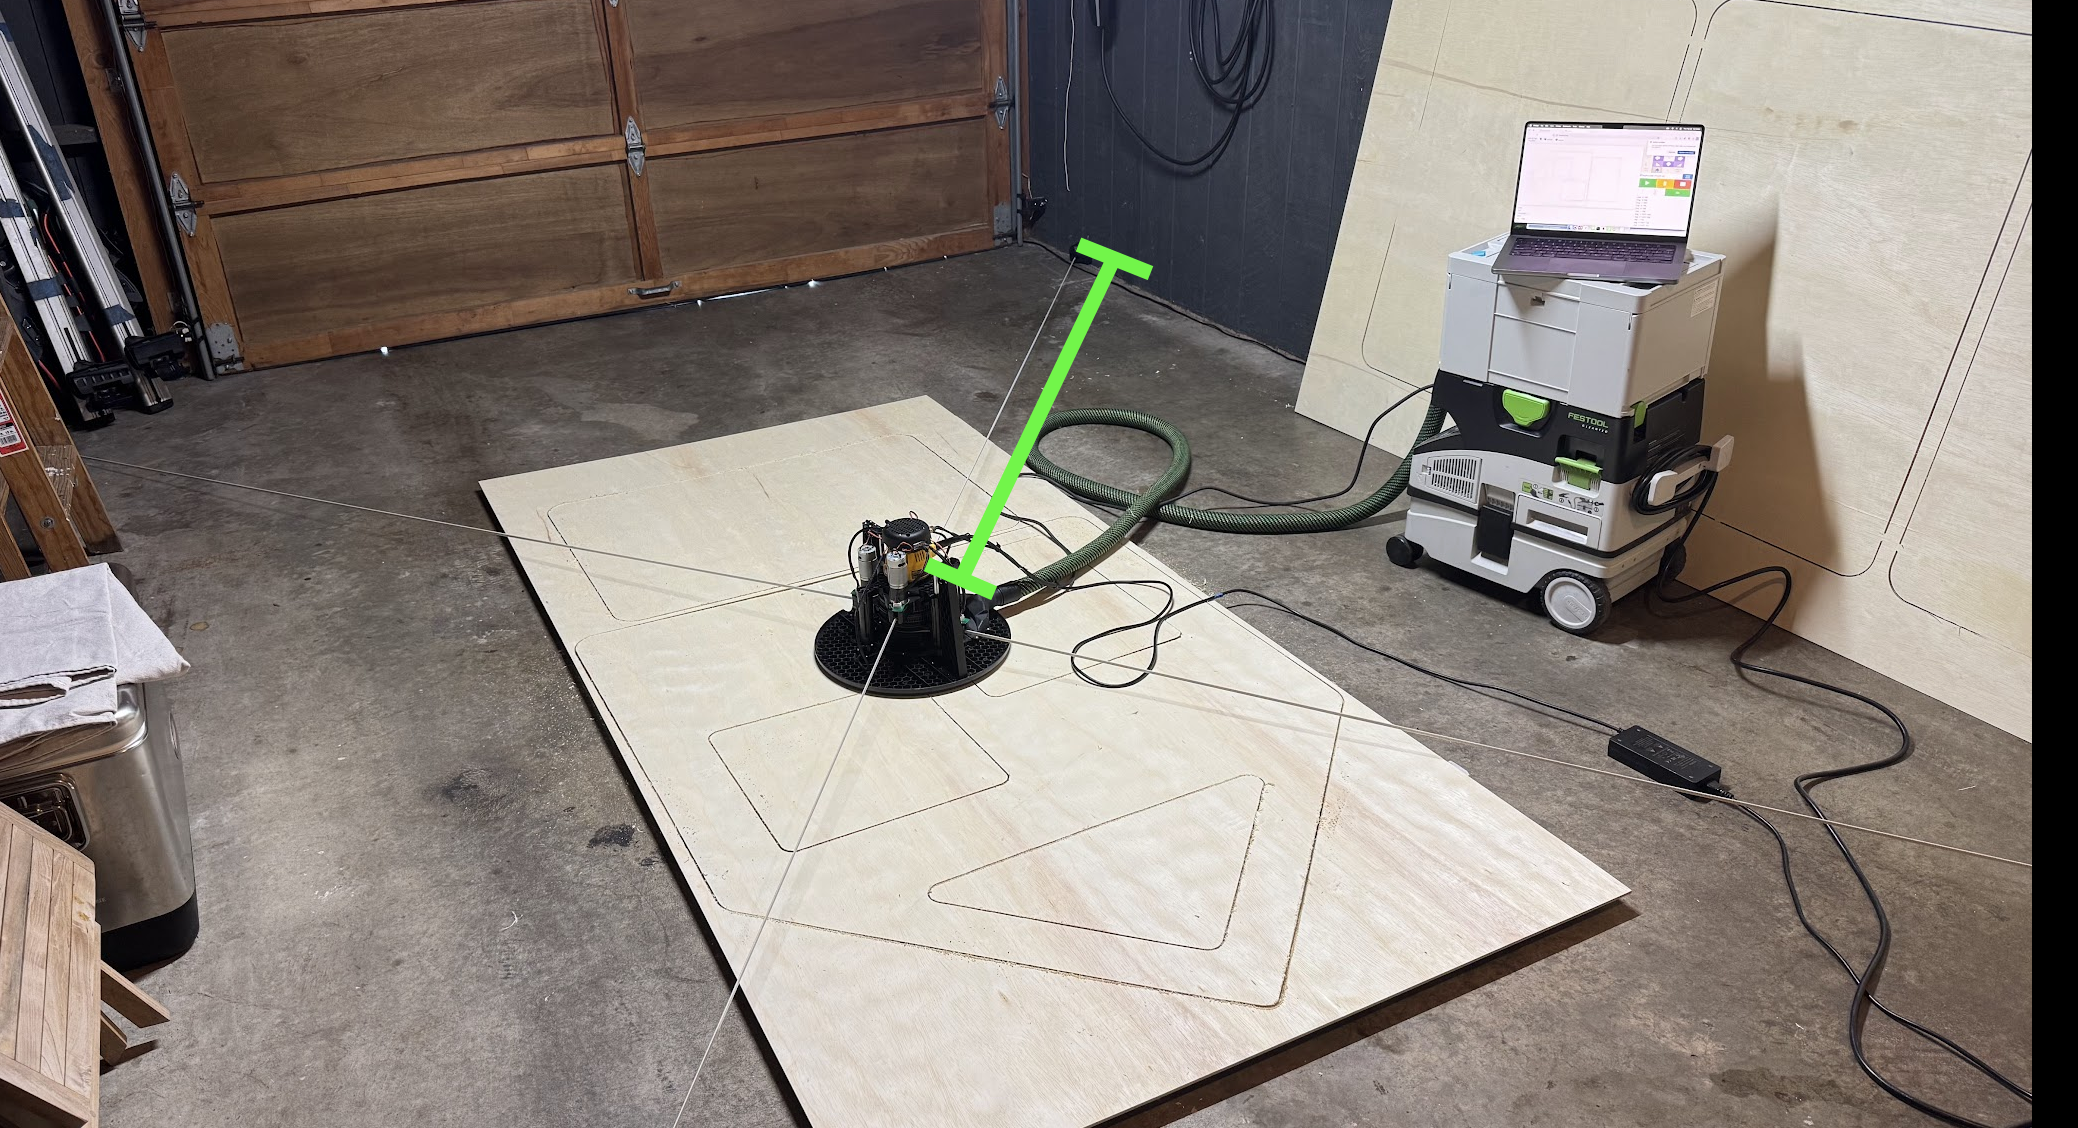
Tips for Best Results
- Work Surface: Use a flat, rigid spoil board to protect your work surface
- Material Hold-down: Secure your material firmly to prevent movement during cutting
- Start Slow: Begin with conservative feed rates and speeds until you’re familiar with the machine
- Test Cuts: Always do a test cut on scrap material before cutting your final piece
- Dust Collection: Connect a shop vacuum to the dust port for cleaner operation
LED Status Indicators
The Maslow 4 control board has two LEDs that communicate machine state at a glance.
| LED | Pattern | Meaning |
|---|---|---|
| Red | Slow blink (300 ms) | Error or emergency stop — check the console for details, then power-cycle |
| Red + WiFi | Rapid double-blink | Motion-control watchdog fired — power-cycle the machine |
| WiFi | Short blinks on startup | Encoding the machine’s IP address on the local network |
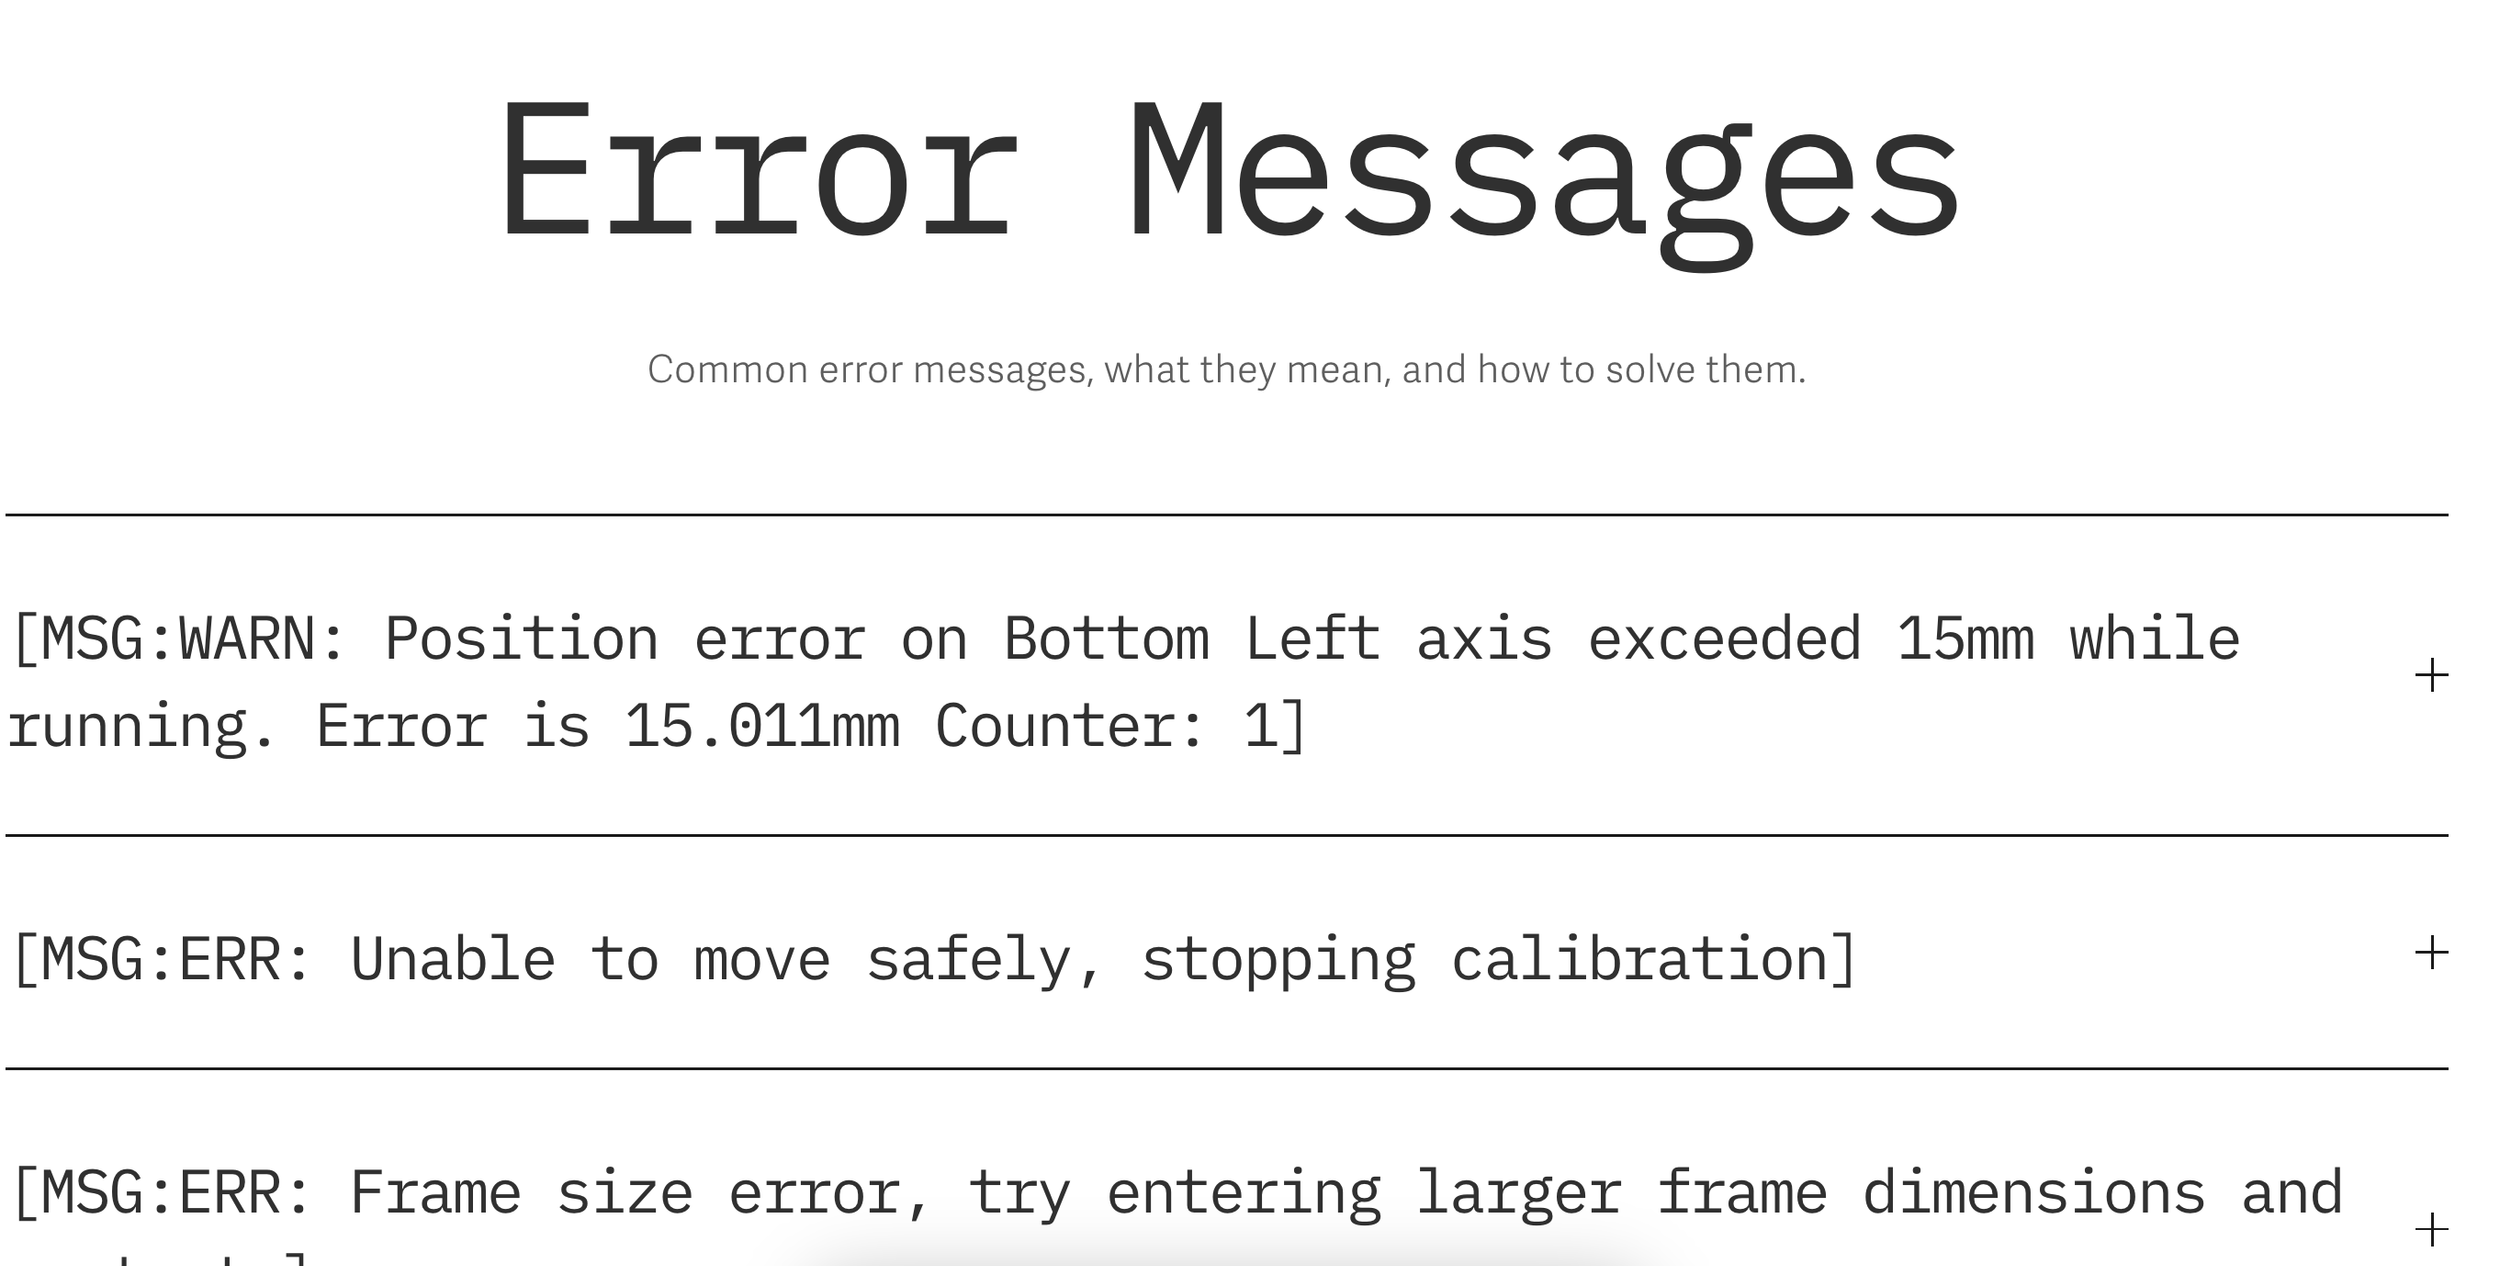
For a full explanation of each error condition see the Troubleshooting Guide.
Troubleshooting
Red LED is blinking
The Red LED blinks slowly (300 ms on/off) when the machine has detected an error. Open the web interface console to read the error message. Common causes are a disconnected encoder or motor cable, a belt that has gone slack, or an emergency stop triggered during a job. Power-cycle the machine after fixing the underlying problem.
If both the Red and WiFi LEDs flash together in a rapid double-blink, the motion-control watchdog fired. Power-cycle the machine.
Cannot Connect to WiFi
- Verify you’re connecting to the correct network (
maslow) - Check the default password (
12345678) - Try power cycling the machine
Web Interface Not Loading
- Manually enter
192.168.0.1in your browser - Try a different browser
- Clear browser cache
Machine Not Responding
- Check all cable connections
- Verify power is connected
- Check the serial connection in the web interface
Resources
- Maslow CNC Forums - Community support and troubleshooting
- Official Assembly Guide
- Firmware Repository
- FluidNC Documentation