This guide is intended to get your Maslow up and running in as few words as possible. It is intended to be used immediately after completing assembly so we can assume that the user has already assembled their machine and they are now looking for how to set it up.
Overall saftey meaures
- Regularly check your machine for evidence of wear or damage.
- Only use in a safe and controlled space.
- Do not leave the machine running unattended.
- Use personal protective equipment including masks, respirators, gloves, hearing protection, and eye protection.
- Do not touch the machine while it is moving or turned on.
- Do not change blades while the machine is plugged in.
- Have a FIRE suppression plan and equipment. This may be the biggest risk. Hot blades ignite dust.
- Consider how you will cut power to the machine in an emergency.
- Check for loose parts, tools, keys, and if the blades are in an appropriate place before providing power to the machine.
- Train yourself and anyone who will come in contact with the machine on your saftely plan.
Choosing your Anchors
Maslow 4 is designed to turn any flat rigid surface into a large format CNC router. This is powerful, but it can lead to an overwhelming number of options.
The best option is to attach the machine directly to a concrete floor. This can be done by either attaching 3D printed anchors to the floor or by adding threaded inserts into the concrete.
The anchors are sized to fit a 10mm or 4/8ths inch bolt.
You can find a complete list of different anchor types here: [ADD LINK]
If you don’t have a floor to connect to you can construct a flat rigid surface to use the machine on. You can find instructions to assemble a basic one that we recommend here: https://www.maslowcnc.com/frame-options
We’ve put together a tool to help you to better understand what size of frame you might want and how that will impact your cutting area. You can find that tool here: https://maslowcnc.github.io/Layout-Simulator/

- Size and other considerations
- Belt ends need to be loose to rotate in the XY directions but gently held in the z direction so they don’t pop up and down.
- Belt ends will be taken on and off a lot.
- Can be horizontal to 20 degrees from vertical.
- Does not have to be exactly rectangular.
- Software limits basic frames to less than 5 meters wide and tall.
- Belts are 4.4 meters long. Cutting area can not be farther than that from an anchor.
Connecting
Maslow4 is controlled using a built-in interface accessible from your web browser. You can connect to Maslow4 from any Windows, Mac, or Linux computer or iOS or Android tablet or phone. You do not need to install any software.
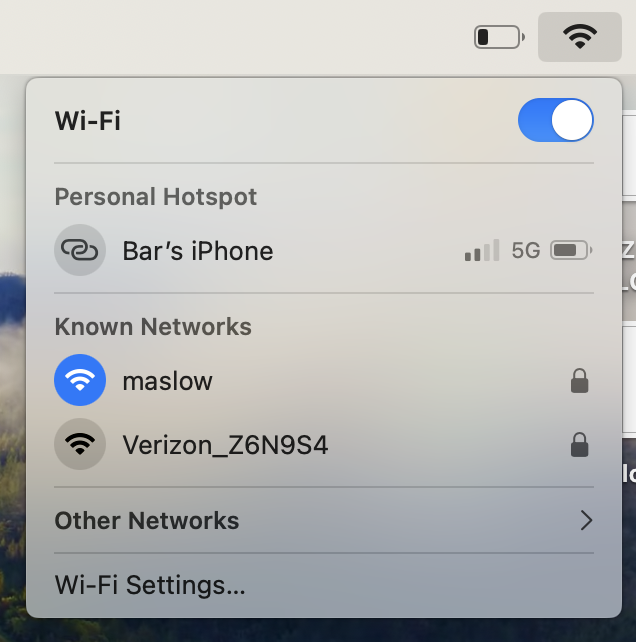
Maslow4 will create a wifi network called “maslow” which you can connect to. The default password for this network will be “12345678”.
Connecting to the network will automatically open the user interface on most devices. If it does not you can type 192.168.0.1 into your web browser to open the interface.
-
Connecting Maslow to your wifi
While you don’t need to connect Maslow to your home wifi network for it to work, if you have wifi available the next thing to do is to connect to it.
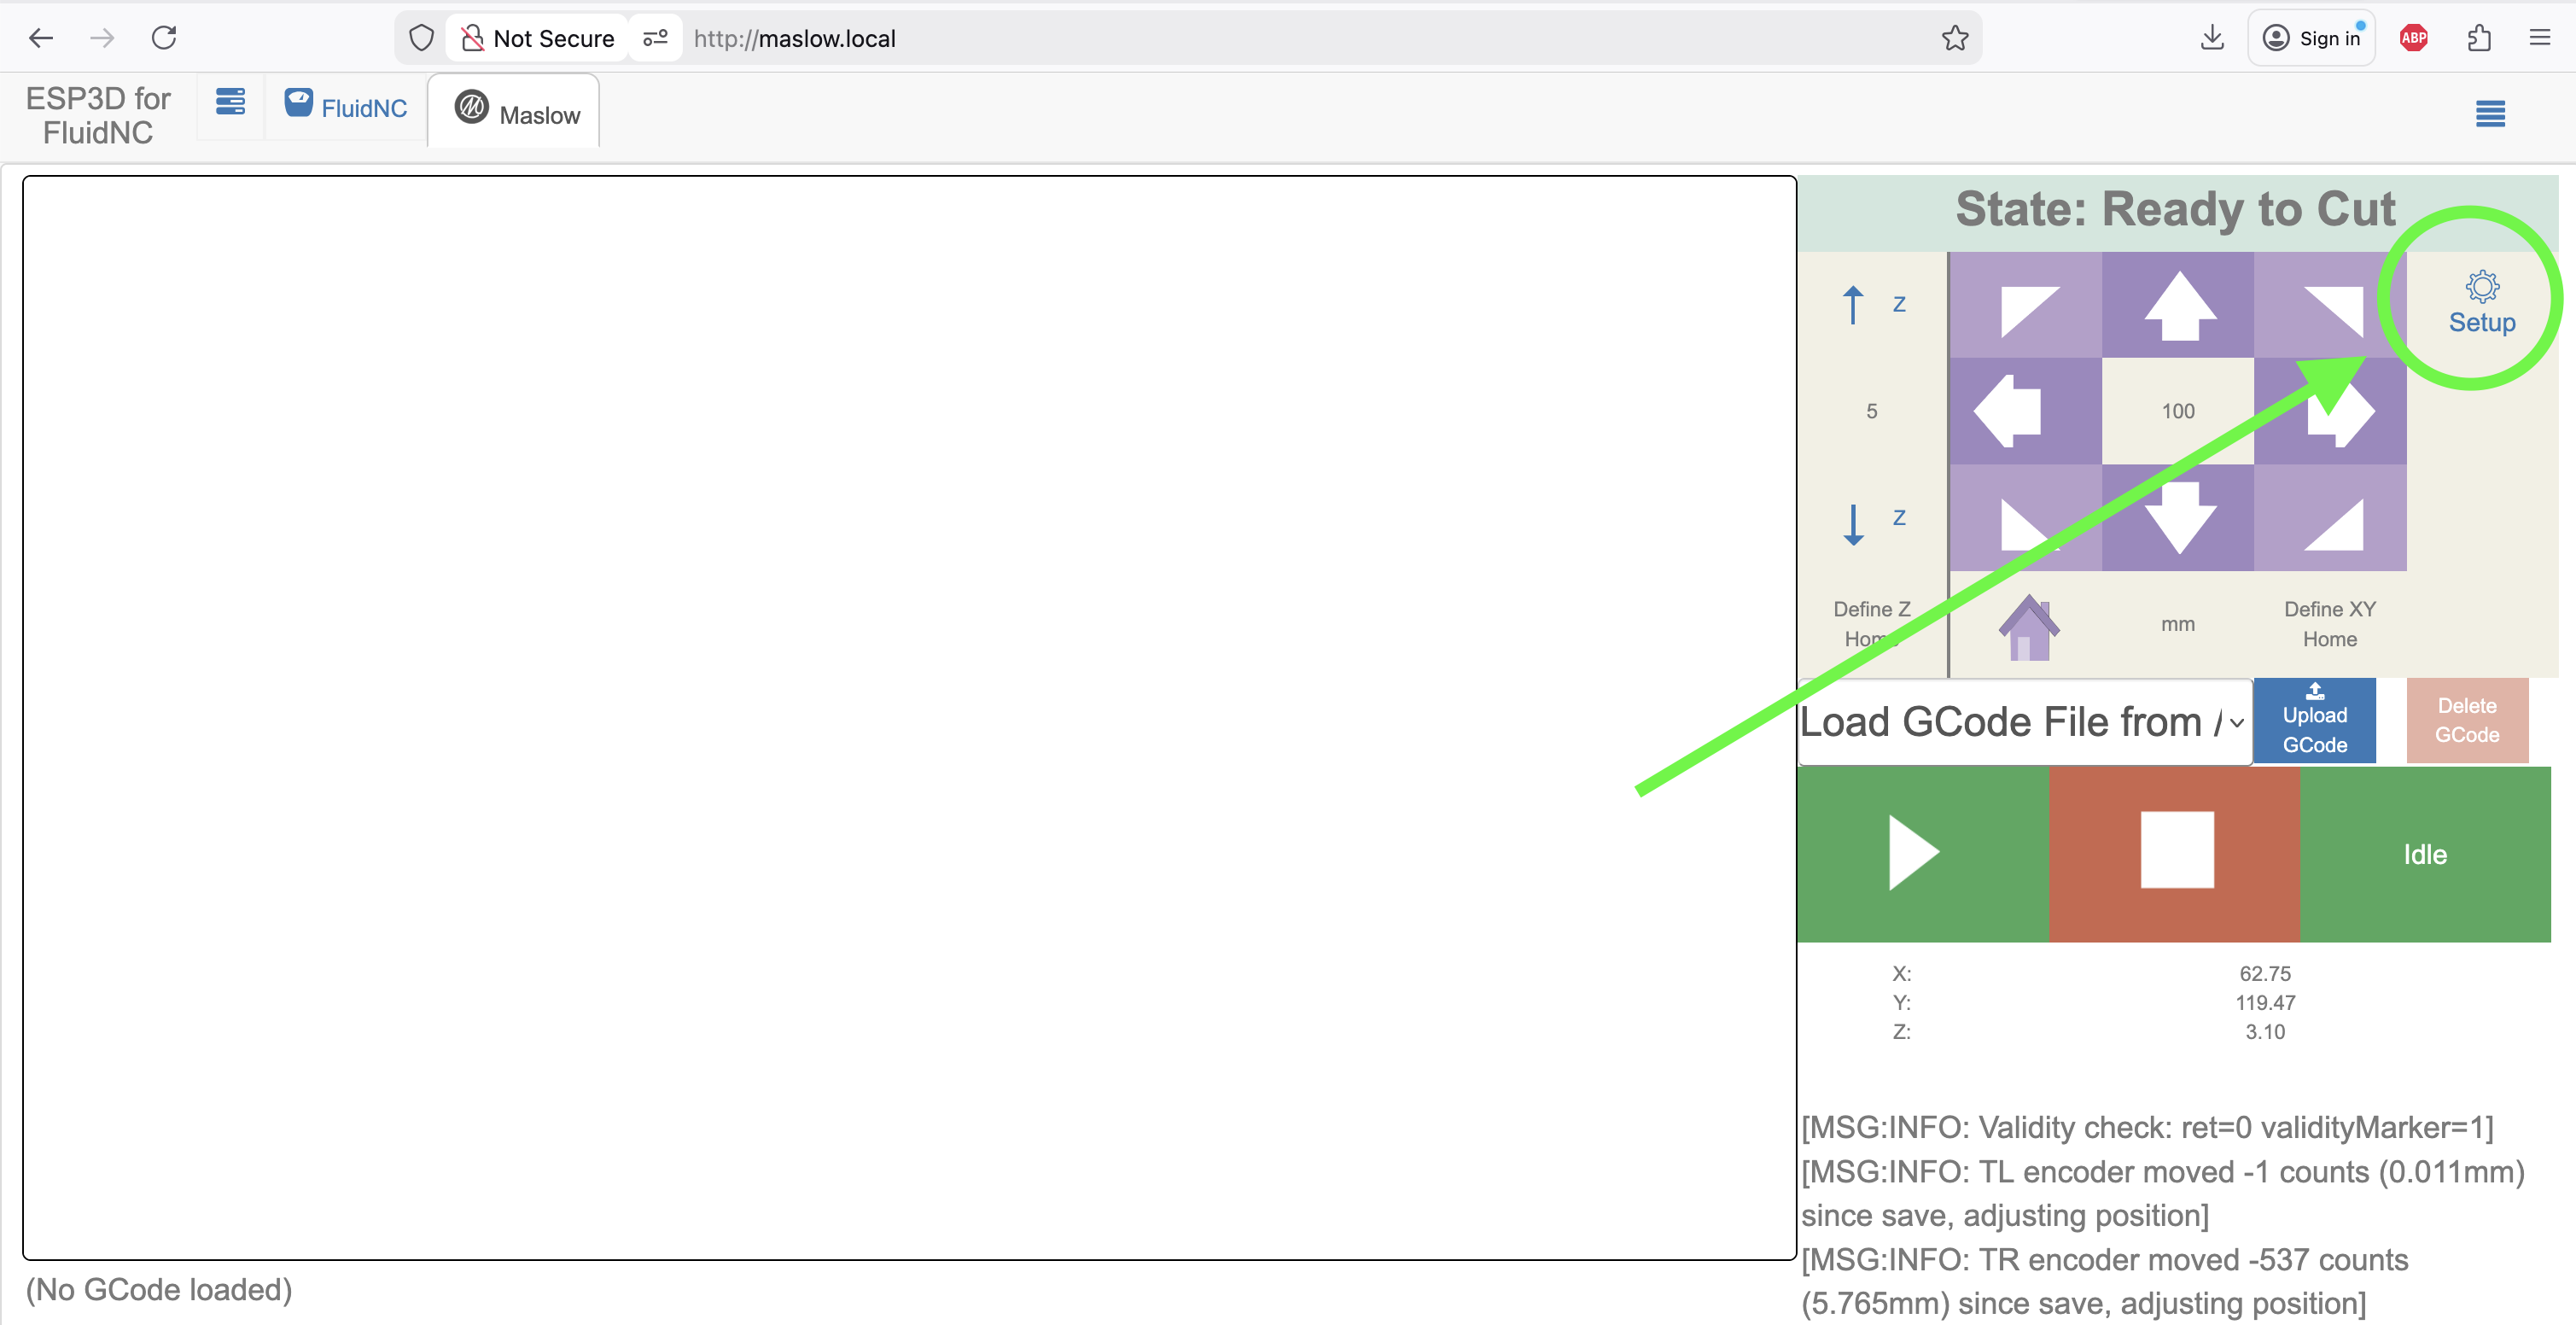
To connect Maslow to your wifi press on “Setup” in the top right corner.
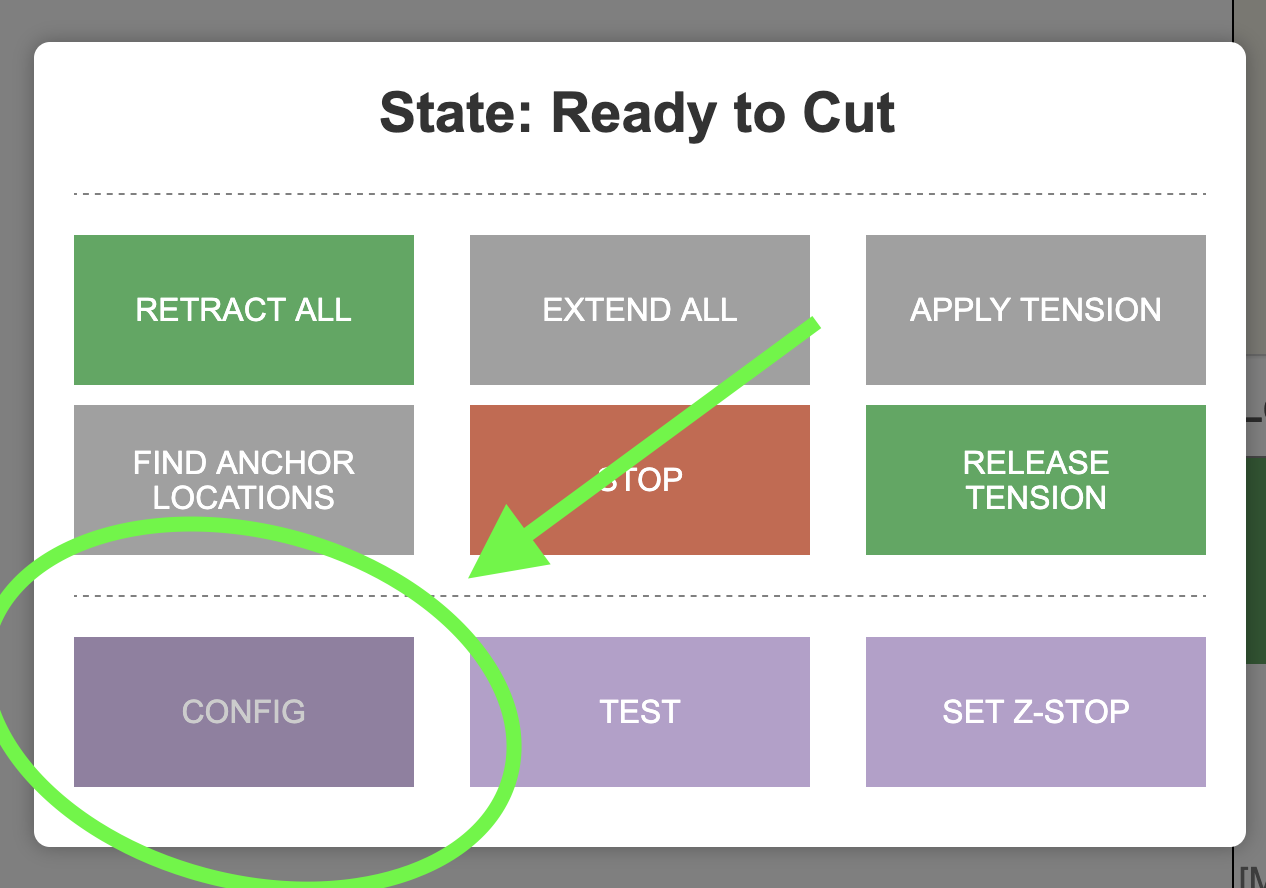
Then press “Config”
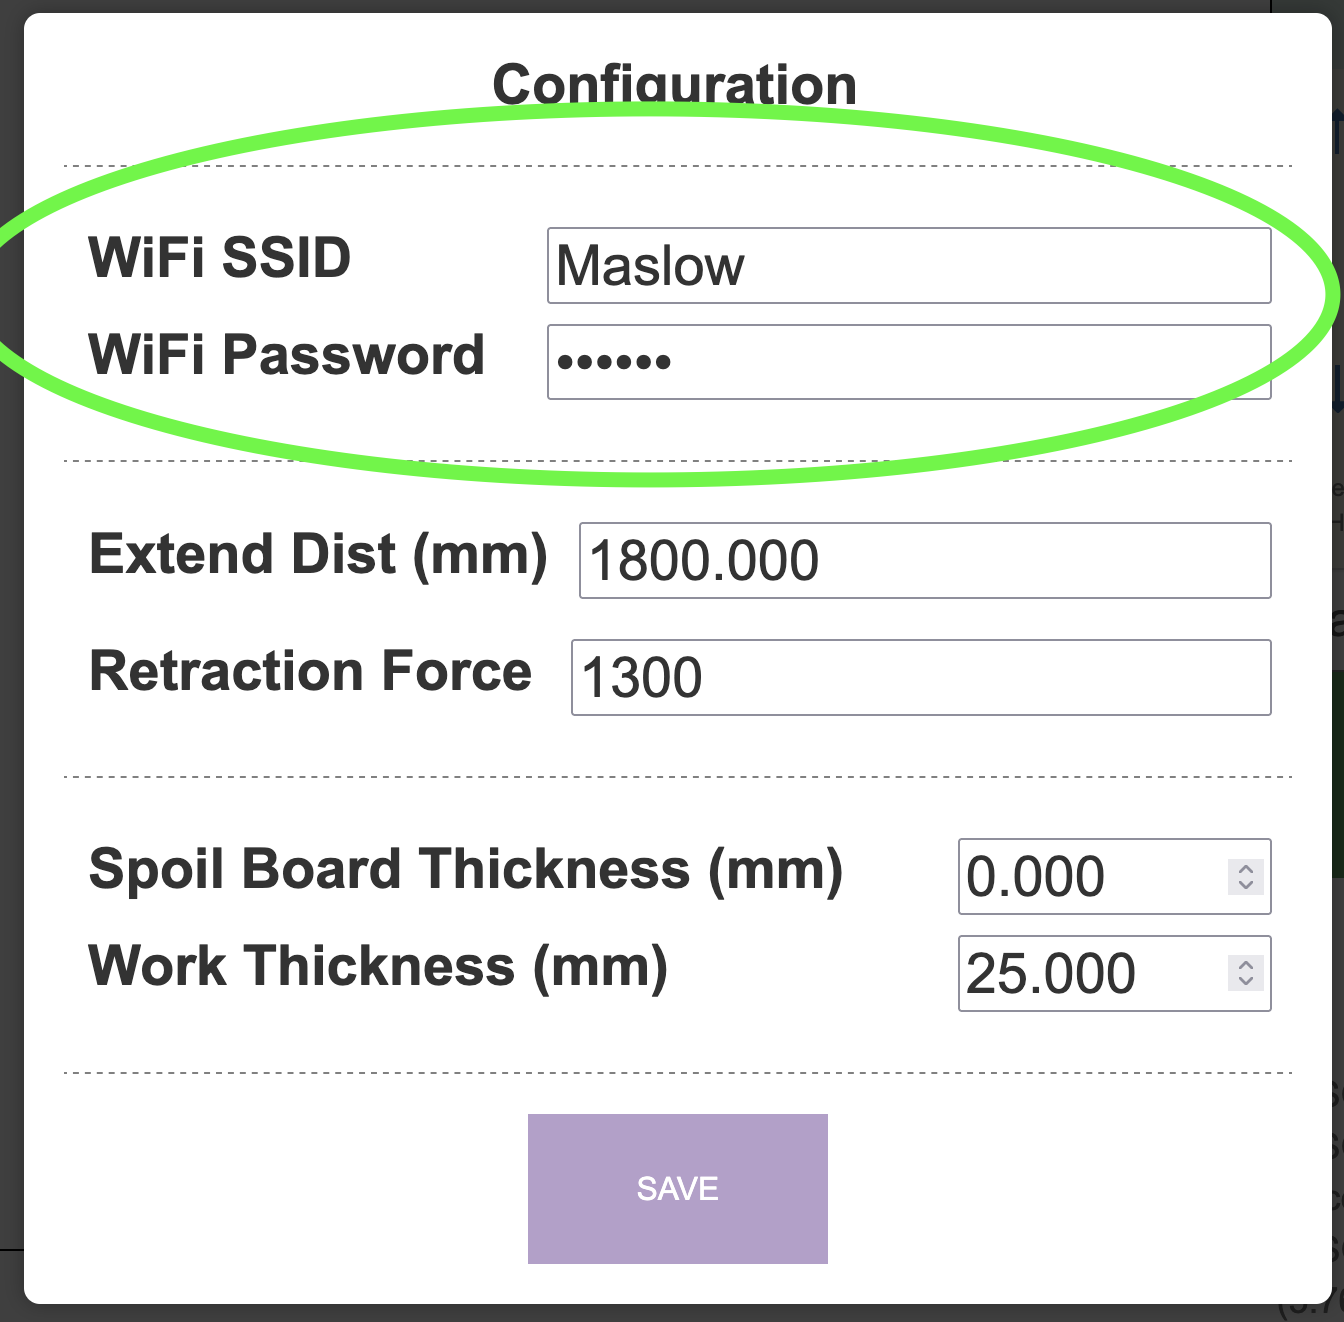
Then enter your wifi network information and press save.
Maslow will try to connect to this wifi network every time it powers up. If it can’t find that network or cant connect for some reason it will create the Maslow wifi network for you to connect to it. Turn your Maslow off and back on to let it connect to your wifi network.
Once Maslow is connected to your wifi network you you can access it by navigating to the address maslow.local from any browser. If you are having trouble finding it try a different device or browser.
As a last resort you can always find your machine’s IP address by counting the blinks of the blue light.

Updating the firmware
Maslow4’s firmware is improving regularly.
Luckily updating the Maslow4 firmware is easy.
To update Maslow4’s firmware click on the FluidNC tab at the top of the screen, then click on the Update the Firmware button, and select your new firmware file.
You can always find the latest firmware version at https://github.com/BarbourSmith/FluidNC/releases
There will be 3 files that you need to download, firmware.bin, index.html.gz, and maslow.yaml. When you download the files, make sure your computer does not change their name. You must change the name back if this happens.
Note: When you first connect to Maslow it will create a popup to control the machine. On some devices you cannot upload files from within that popup (the window won’t open). The solution is to connect to Maslow from a regular browser window.
Note that to update from a firmware version before 1.0 to a version after 1.0 you will need to use a USB cable. There is a video walkthrough for that process here.

There are two other files which you will need to update periodically. These can be found by clicking on the FluidNC tab and then clicking on the files button.
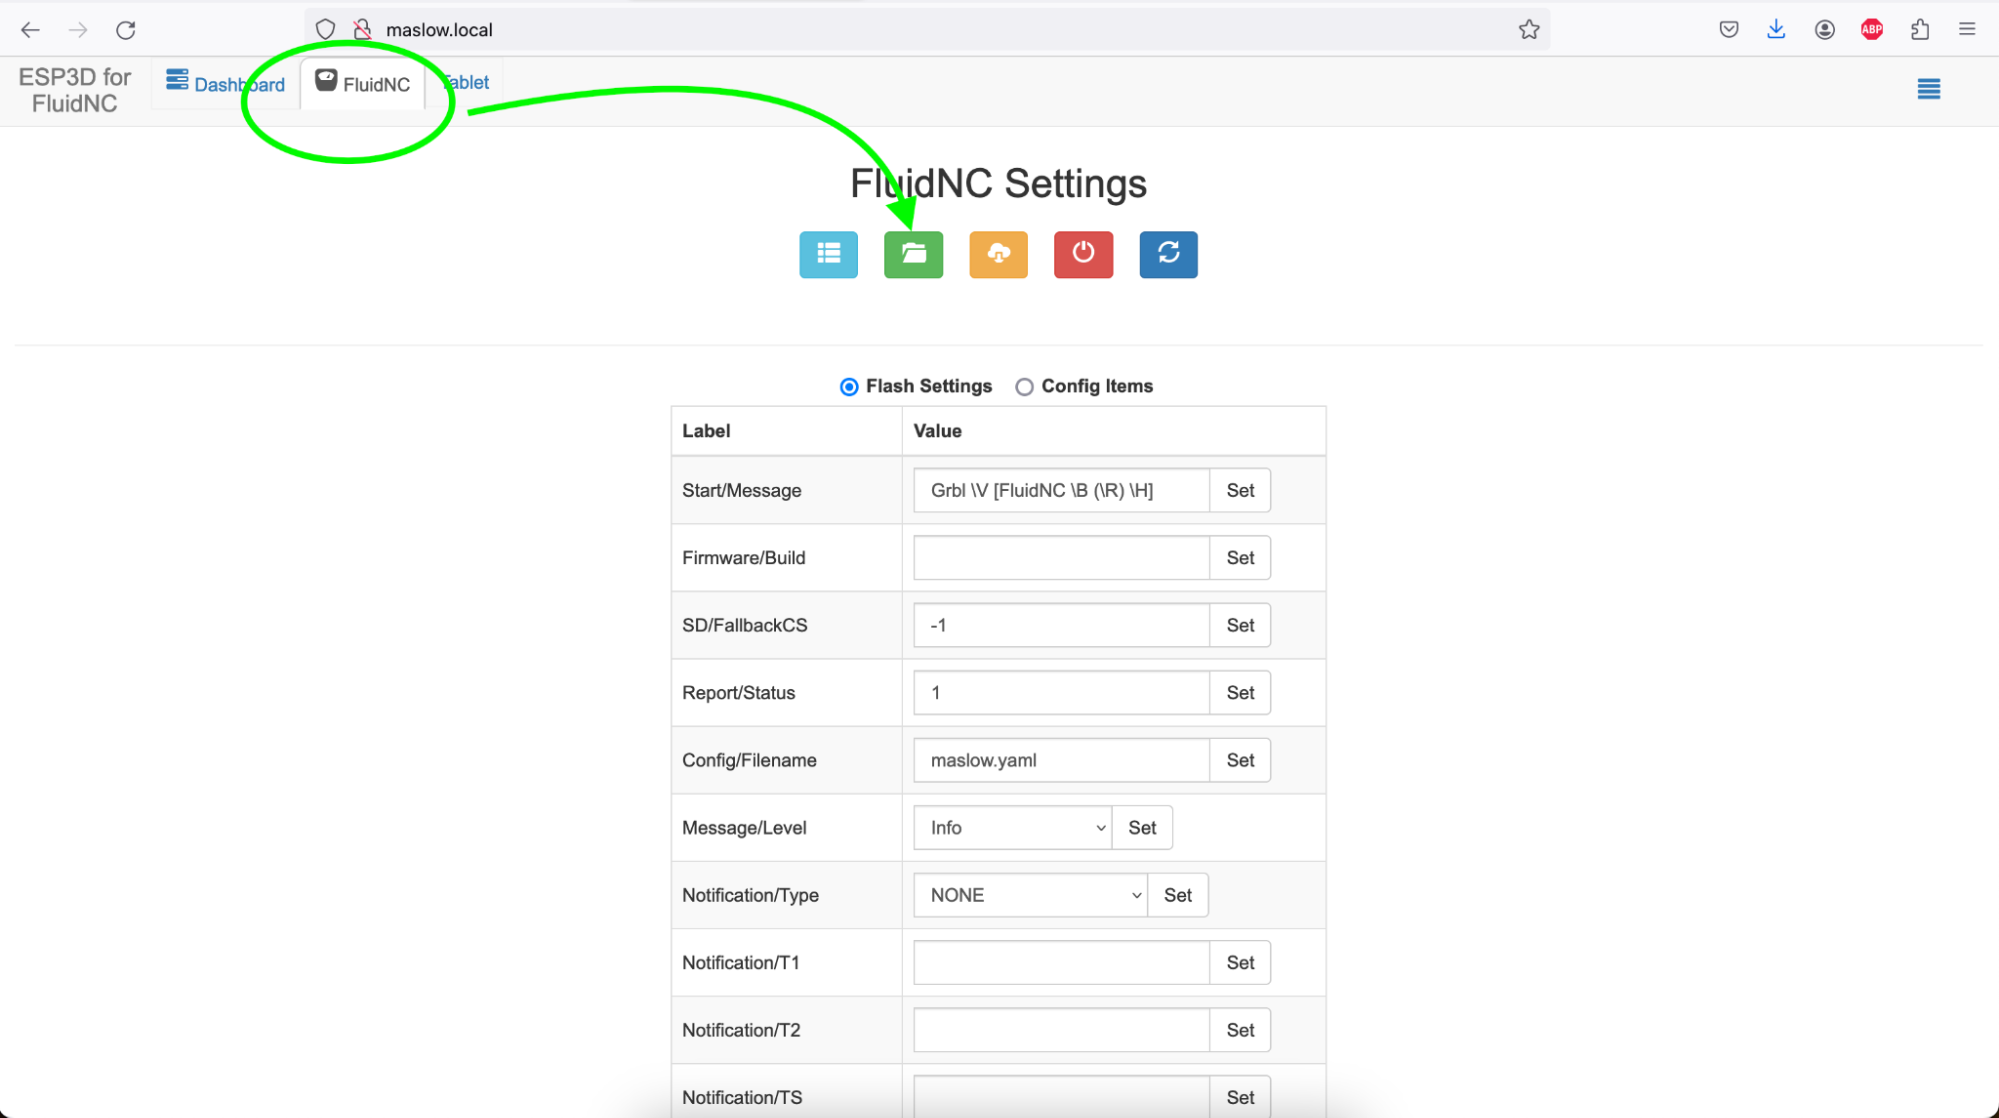
This will show you your system files.
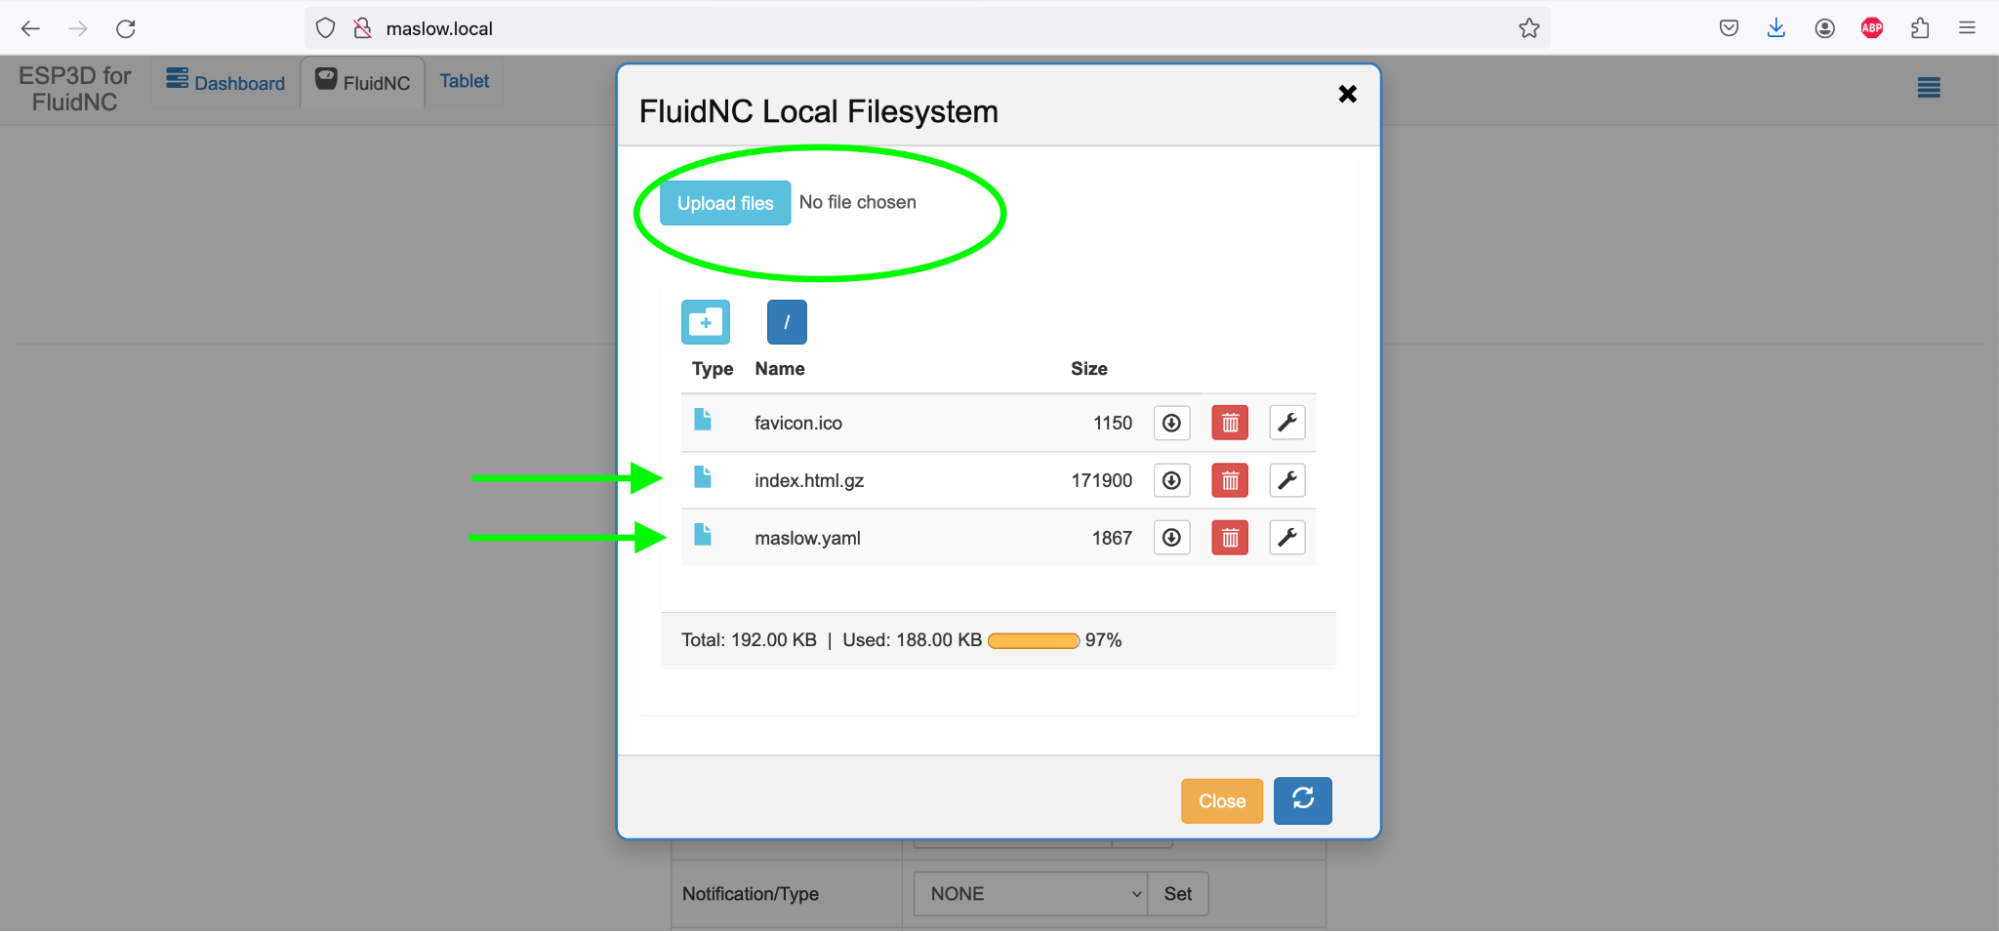
To upload a new file click the Upload files button at the top of the screen. If a file with the same name already exists it will be replaced.
index.html.gz controls how the machine interface looks. If you wanted for example a dark mode, replacing this file would give the interface a new look. I expect that there will be a number of community created UI options created quite quickly.
maslow.yaml contains the configuration settings for your machine. Your calibration values are stored here. You may not need to update the yaml each time you update the index and the firmware.
Extending and Retracting the Belts
The Maslow 4 belts can be retracted for storage and extended for use.
Every time that the belts are retracted the machine will use that as an oportunity to reset it’s understanding of how long each belt is. This is done by monitoring the current required to retract each belt. If your machine is in an unknown state retracting the belts will help it to understand exactly where it is.
To retract the belts press Setup -> Retract All

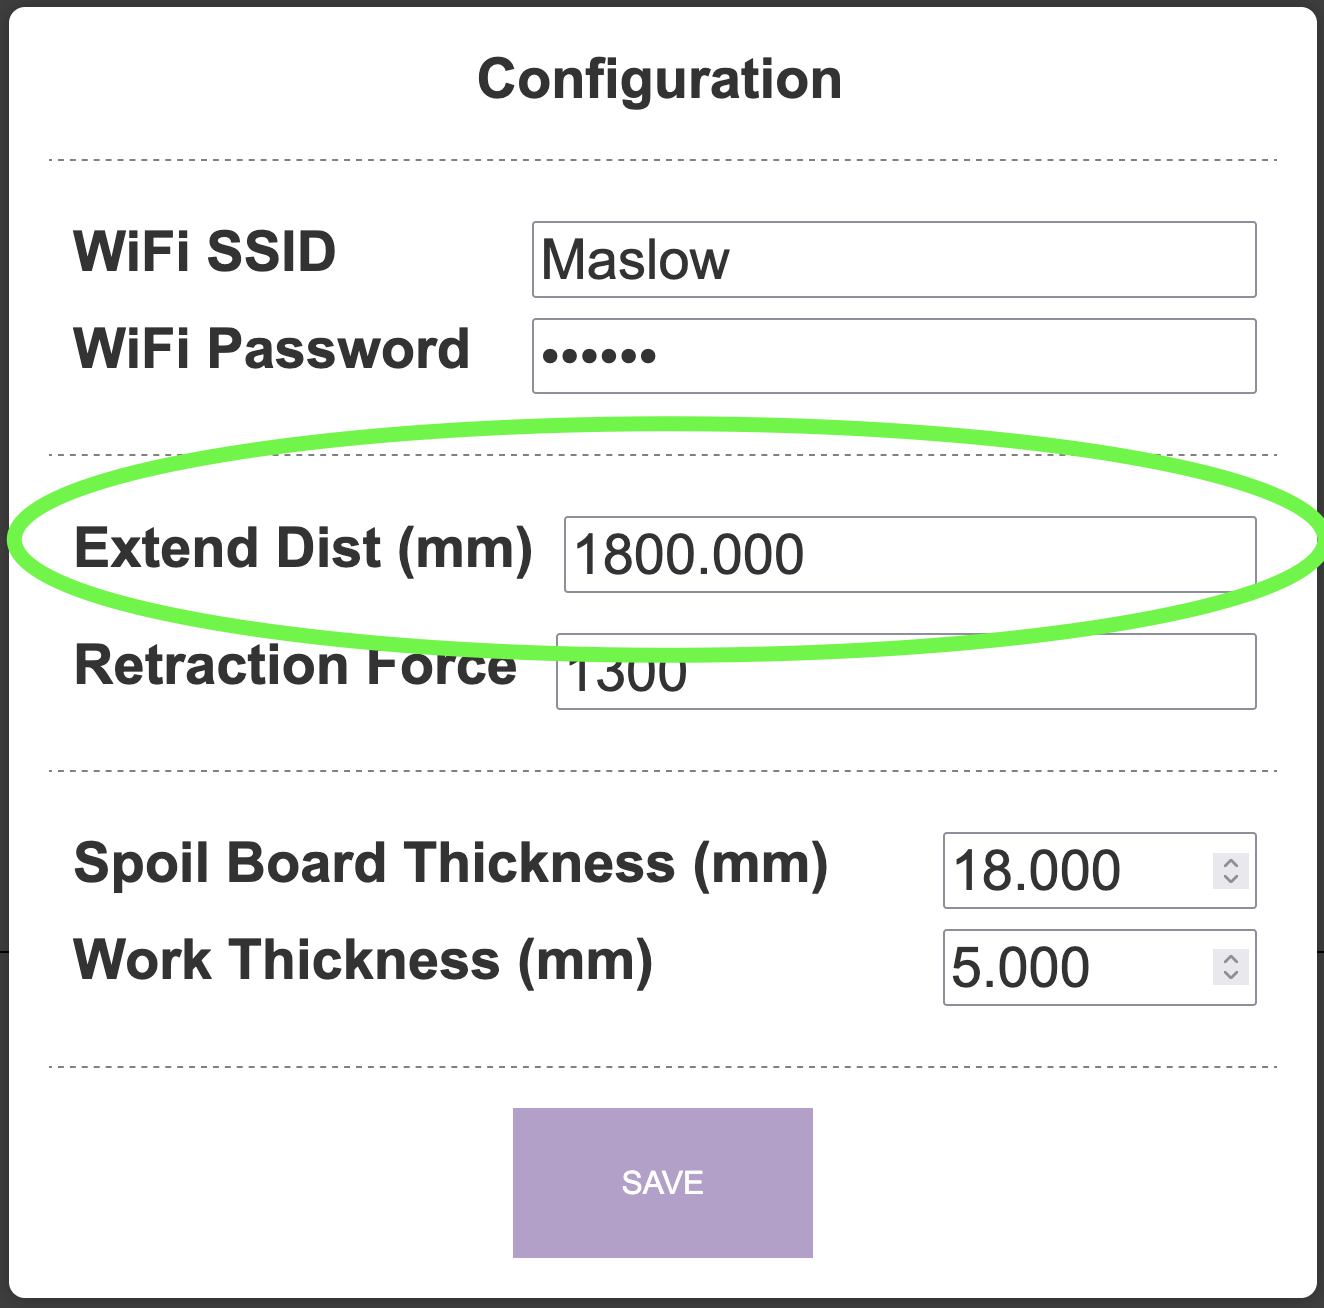
If all of your belts don’t fully retract you may need to increase the amount of force that the machine uses to retract. You can do this by clicking on Config and increasing the retraction force. The lower that this number can be the better.

When you are ready to extend your belts, press Extend All. Extending the belts can take a little practice. To prevent tangles the belts will only extend as long as you are pulling on them. Use a rocking motion to start the belts extending and then pull steadily.

The belts will extend to the length set in the config file. If you need to extend more belt to reach your anchor points, adjust the number there and press Extend All again.
Once all four belts are fully extended you will hear the cooling fan turn off. Connect each of the four belts to your four anchor points.
Finding your anchor point locations
If you haven’t prevously connected your machine to these anchor points, you will need to locate them. This can be done with a tape measure, but that is slow and error prone.
Press Find Anchor Locations to have the machine take a series of measruements to automatically locate the anchor points for you. The machine will move through a grid of points and take measurements at each one.
Be sure to leave your web bowser tab open through the entire process because the calculations will be done there since your computer has much more processing power than the ESP32 in the Maslow.
Keep an eye on the machine during this entire process, it may be tempting to walk away, but it is important to keep an eye on it.

Generating gcode
Before you can cut anything with your Maslow, you’ll need to create gcode files. Gcode is the language that tells the machine where to move and how to cut.
There are many different CAM (Computer Aided Manufacturing) programs available to generate gcode. Some popular options can be found here: https://www.maslowcnc.com/software-guide
Uploading to Maslow
Once you have a gcode file, you can upload it to your Maslow.
To load your gcode file onto the machine press the Load File button in the interface.
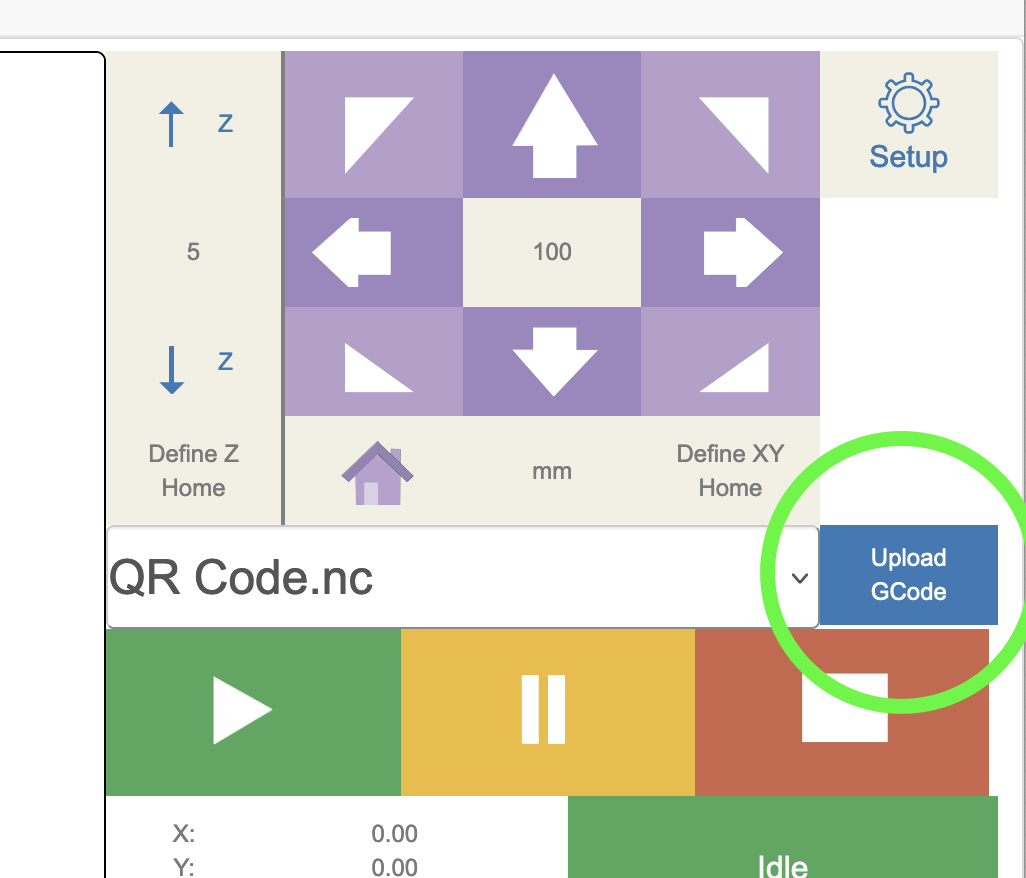
This will open a file browser where you can select your gcode file from your computer. The file will be uploaded to the Maslow and will be ready to run.
Once uploaded, you can select your file from the drop down menu to prepare it for cutting.
Move the machine around
You can move your Maslow around using the arrow buttons on the right side of the screen.
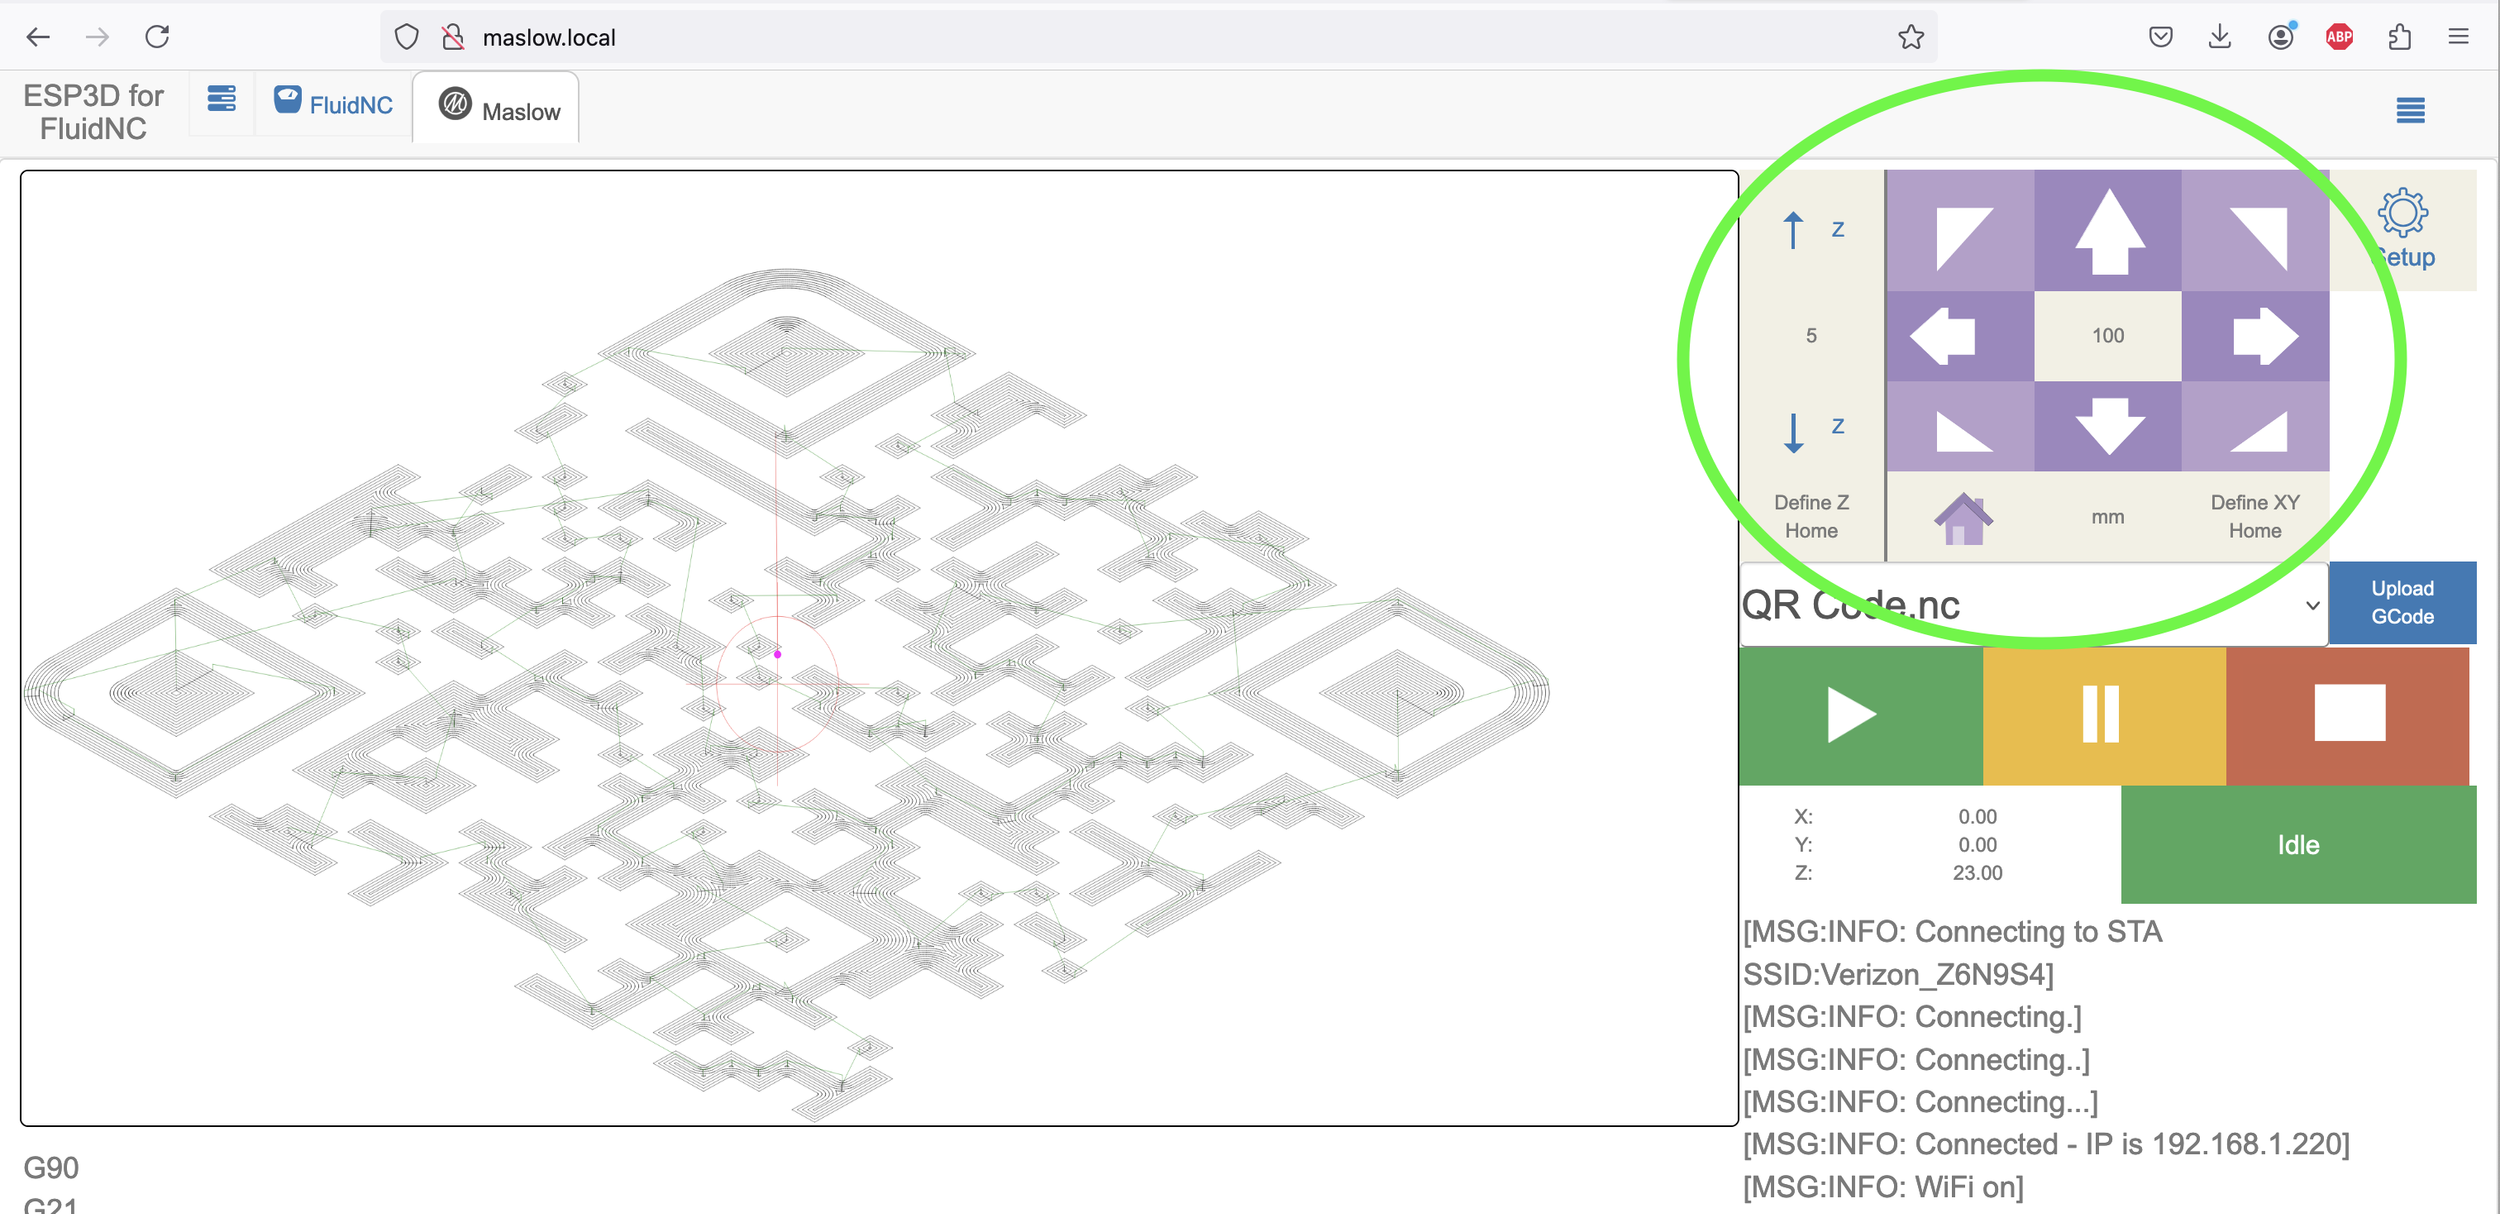
The distance that it will move can be set by clicking on a distance number.
There are separate distances for XY movements and for Z axis movements.
You can switch between mm and inches by clicking on the units.
Use these controls to position the machine where you want to start your cut or to test that the machine is moving correctly.
Define home position
When you create a gcode file it will have a “home” position. The home position is shown with a cross in a circle on the interface. When you created your gcode file, it was set up so your shape would be cut relative to this home position. The current position of the machine is shown with a purple dot.
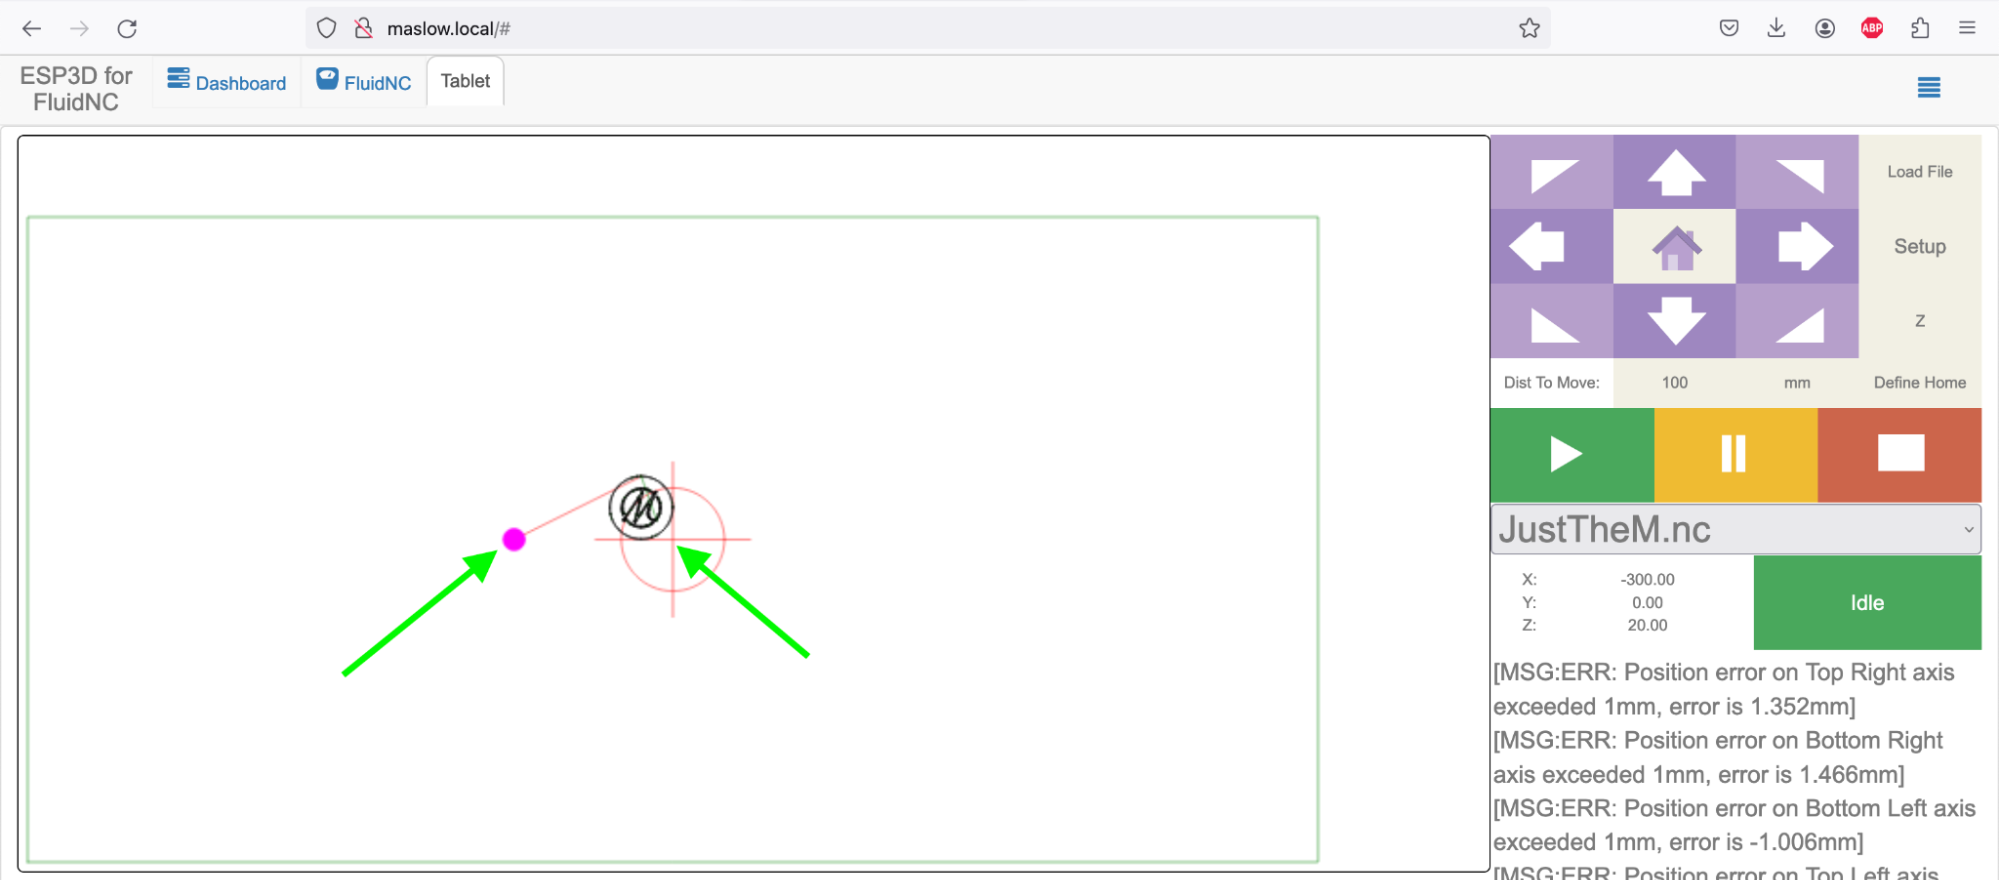
If you want to move where the file will be cut on the sheet of plywood you can press the Define Home button which will move the file’s home position to the machine’s current position. This lets you move the shape you want to cut anywhere on the sheet.
Similarly you can set where the home position is for the z-axis. This will set where the router will start cutting which is typically on the top surface of the plywood. To set the home position for the z-axis:
- Move the z-axis up or down with the Up and Down buttons until the router bit is just touching the surface of your material
- Press Define Home to set the z-axis home position
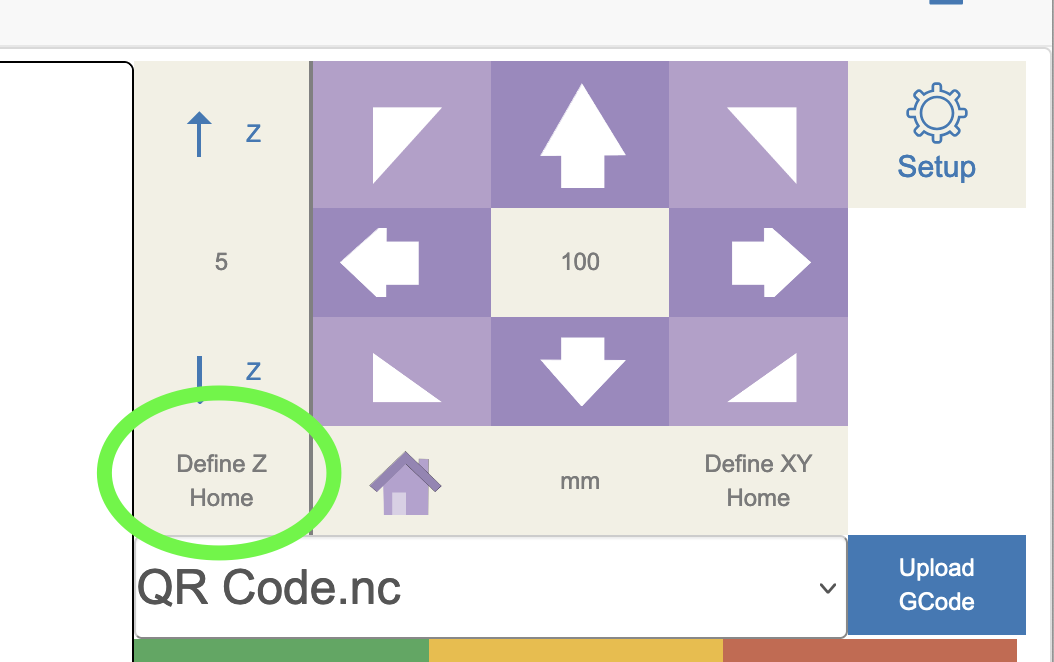
This ensures that your cuts will be at the correct depth.
Running a file
Once you have uploaded your gcode file, positioned the machine, and set the home positions, you’re ready to run your first cut!
To run the file:
- Make sure your file is selected from the drop down menu
- Double-check that your home positions are set correctly (both XY and Z)
- Ensure your router is turned on and at the correct speed
- Press the green play button to start the cut
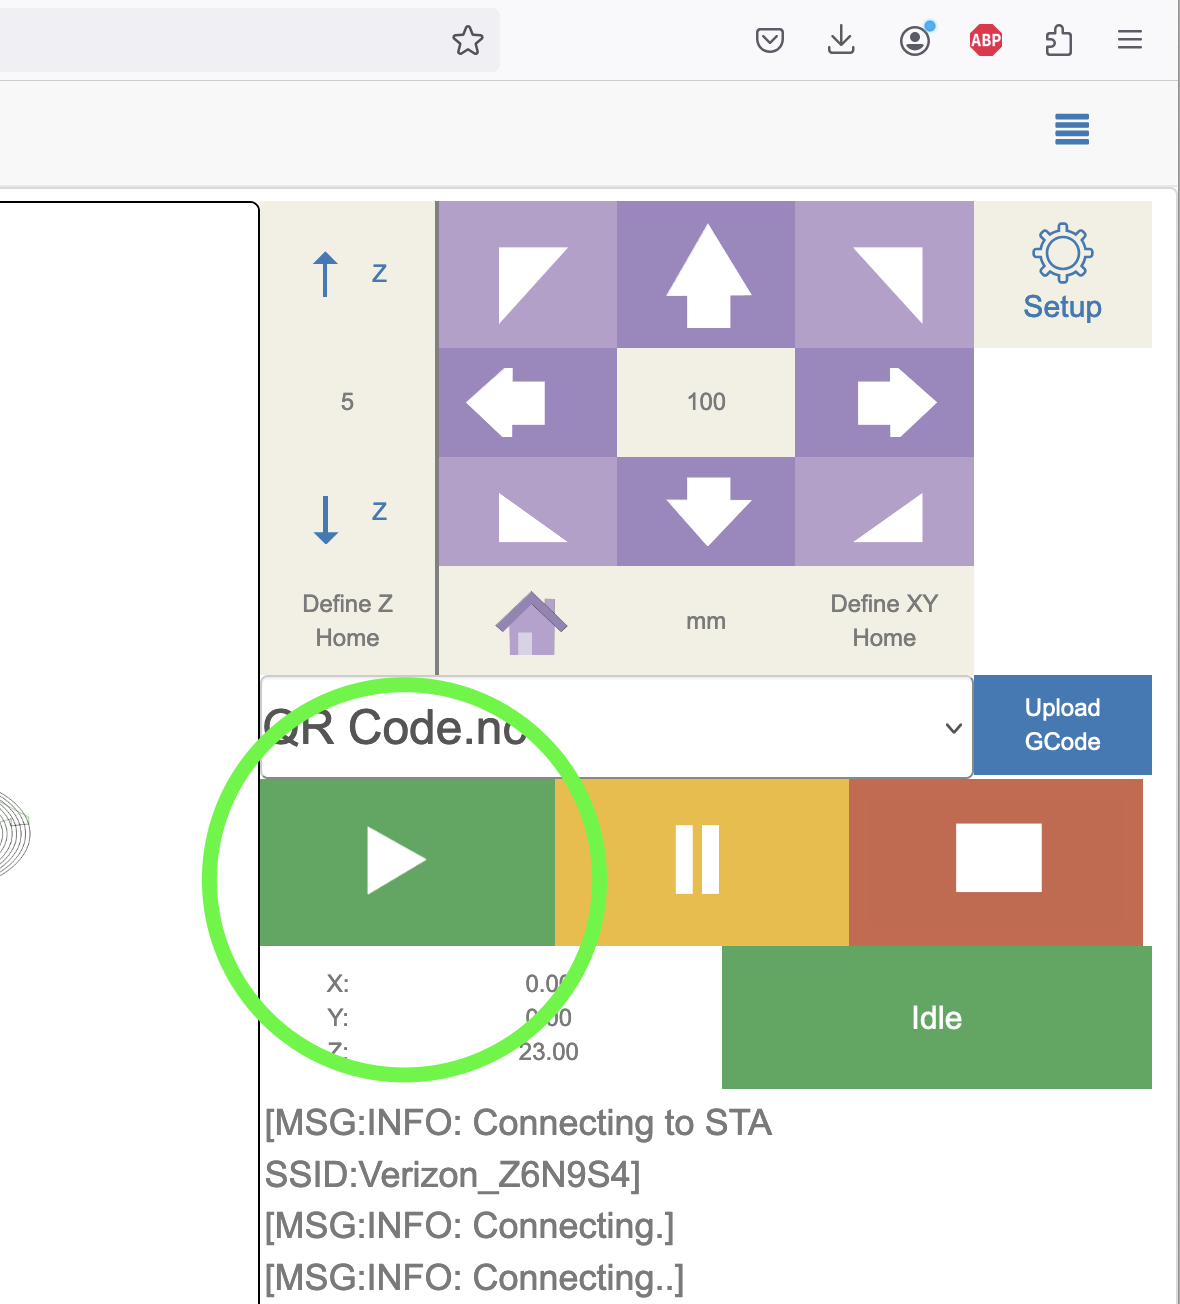
The machine will begin following the toolpath in your gcode file. You can:
- Pause the cut at any time by pressing the pause button
- Stop the cut by pressing the stop button
- Monitor the progress on screen
Stay nearby while the machine is cutting, especially for your first few cuts. This will help you identify any issues early and ensure everything is working correctly.
If you encounter any problems or error messages, check the error messages documentation or ask for help in the Maslow forums.